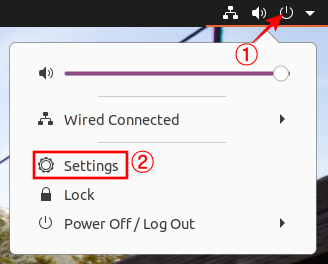
Ubuntu 18.04 LTS 에서 설치하는 방법은 이곳에 : https://blog.lael.be/post/7264
Ubuntu 14.04 LTS 에서 설치하는 방법은 이곳에 : https://blog.lael.be/post/4518 글 비밀번호는 ubuntu 입니다.
이 글은 Ubuntu 16.04 LTS 에 맞추어 작성되었습니다.
#16.10.04 무료 보안인증서(SSL) 적용방법이 추가됨
무료 보안인증서 설치방법이 추가되었습니다. HTTPS 사용을 원하신다면, 본문을 다 읽으신 후 다음의 글로 이동해주세요.
https://blog.lael.be/post/5107
이 문서는 2010년 4월 12일에 처음 쓰여졌으며, 주기적으로 업데이트/유지보수 되고 있습니다.
이 문서는 항상 최신버전(Edge Version)의 세팅법을 설명합니다.
이 글에서는 자동화되고 유지보수 관리되는 설치방법을 설명하고 있습니다.
아래의 방법대로 설치한 후에 언제든지
|
1 |
apt-get update
|
|
1 |
apt-get upgrade
|
명령을 사용하면, 항상 빠르고 안전한 최신버전의 서버 소프트웨어를 사용하실 수 있습니다.
* 이 글은 Ubuntu 에 PHP 웹서버를 세팅하는 방법을 소개하고 있습니다.
* PHP를 최신버전으로 구축하고 싶다면 https://blog.lael.be/post/2600 글로 이동하세요. (Nginx + PHP7-FPM + MariaDB)
- CentOS 에서 PHP 를 구축하고 싶다면 https://blog.lael.be/post/1721 (Apache + PHP + MariaDB)
* Ubuntu 에서 JSP 웹서버 세팅을 원하시면 https://blog.lael.be/post/858 글로 이동하세요.
* Ubuntu 에서 PHP와 JSP를 동시 구동하고 싶으시면 https://blog.lael.be/post/1023 글로 이동하세요.
* Ubuntu 가상서버호스팅을 찾는 중이라면 https://blog.lael.be/post/44 글로 이동하세요.
현재 배포된 Ubuntu 버전은 아래와 같습니다.
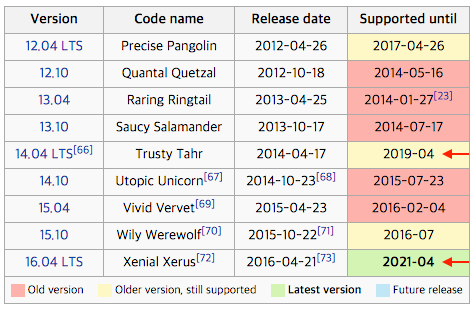
운영체제의 수명이 긴 LTS 버전을 설치하도록 합시다. (버전숫자가 높다고 더 좋다는 뜻은 아님)
Ubuntu 운영체제에 관해서는 http://en.wikipedia.org/wiki/Ubuntu_(operating_system) 를 참조하세요.
이 문서에서 설치는 Ubuntu 16.04 LTS를 기준으로 합니다. (14.04 와는 패키지가 약간 다를 수 있음)
참고로
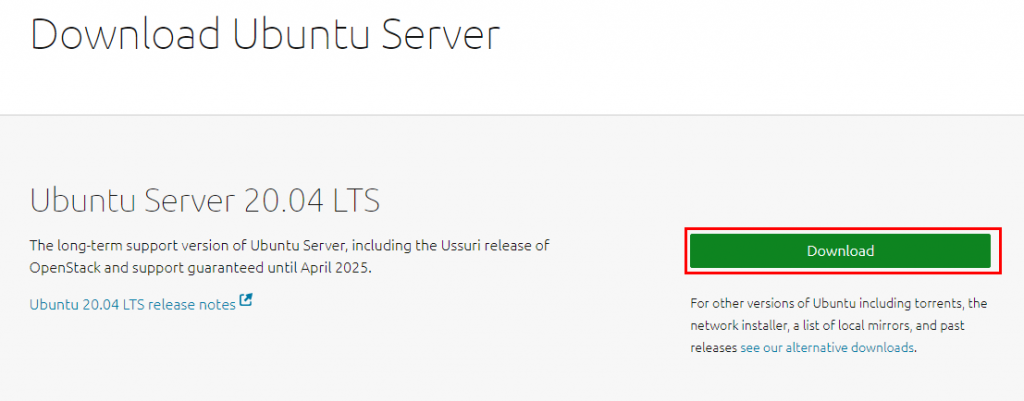
Ubuntu 14.04 LTS 다운로드 이미지는 http://releases.ubuntu.com/14.04/ubuntu-14.04.5-server-amd64.iso 이며,
Ubuntu 16.04 LTS 다운로드 이미지는 http://releases.ubuntu.com/16.04/ubuntu-16.04.4-server-amd64.iso 입니다.
일반 사업체 및 실무 서비스에서 사용할 수 있는 안정적인 세팅법을 알려드리겠습니다.
0) root 권한으로 변경
기본으로 주어진 계정이 root 가 아닐 경우에만 0번을 따라하세요.
본문의 모든 명령어는 root 의 권한에서 실행해야합니다. 자신에게 주어진 계정이 root 계정이 아니라면 다음의 명령어로 root 로 전환해 주도록 합시다.
자신의 계정 보기
# whoami
sudo 명령어 실행. root 권한으로 root 로 로그인하는 명령어를 실행한다.
# sudo su
자신의 계정 보기
# whoami
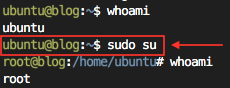
기본 계정의 UserID 는 그림과 다를 수 있음. 위 예시에서 기본 아이디는 ubuntu 이다.
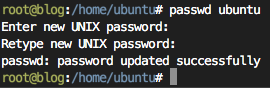
sudo 명령어를 사용할 수 있는 계정은 root 와 동급이니 비밀번호 관리에 신중해야한다. 기본 계정의 비밀번호를 매우긴 어려운 것으로 변경해주도록 하자.
# passwd ubuntu
1) 리눅스 버전체크
#uname -a Linux Lael-ubuntu-xenial 4.4.0-21-generic #37-Ubuntu SMP Mon Apr 18 18:33:37 UTC 2016 x86_64 x86_64 x86_64 GNU/Linux
2) Ubuntu 버전체크
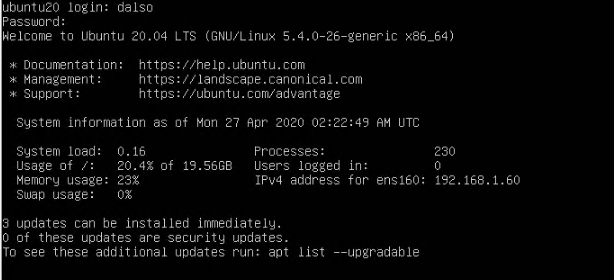
#cat /etc/issue Ubuntu 20.04.2 LTS \n \l
조금 더 자세하게 운영체제 버전정보를 알아보고 싶다면
# lsb_release -a
해당 명령어는 Ubuntu 에서는 기본적으로 설치되어 있지만 CentOS 계열에서는 기본패키지가 아니니 사용하려면 다음 명령어로 설치해주어야 합니다.
# yum install redhat-lsb-core
3) 하드용량체크
#df -h Filesystem Size Used Avail Use% Mounted on udev 2.0G 0 2.0G 0% /dev tmpfs 396M 6.2M 390M 2% /run /dev/vda1 85G 3.6G 77G 5% / tmpfs 2.0G 192K 2.0G 1% /dev/shm tmpfs 5.0M 0 5.0M 0% /run/lock tmpfs 2.0G 0 2.0G 0% /sys/fs/cgroup tmpfs 396M 92K 396M 1% /run/user/1000 tmpfs 396M 0 396M 0% /run/user/0
대략 다 더하면 90G가 나온다.
4) 메모리 체크
#free -m total used free shared buff/cache available Mem: 3951 770 2262 10 918 3116 Swap: 4093 0 4093
3951M의 전체메모리중 현재 770M을 사용하고 있고 3116M가 비어있다.
4-1) CPU 코어수 확인
cpu정보 프로세스를 읽어서 processor 항목이 몇개인지 갯수를 셉니다.
#cat /proc/cpuinfo | grep processor | wc -l

위의 사진은 6 core 를 뜻합니다.
한번 정도는 다음의 명령어를 확인해 보세요.
#cat /proc/cpuinfo | grep processor#cat /proc/cpuinfo
5) 현재 서버에 설치된 패키지 최신버전으로 업그레이드
APT 목록 갱신
APT란 Advanced Packaging Tool 을 뜻합니다.
우리는 apt 라는 우분투에 내장된 프로그램을 이용해서 프로그램을 쉽게 설치/제거 할 수 있습니다.
패키지 목록 갱신.
#apt-get update
현재 운영체제에 설치되어있는 프로그램 최신버전패치
#apt-get upgrade
6) 시스템 시간 설정
이것을 하지 않으면 영국 시간을 불러올 것이다.
물론 초기 설치할 때 Asia/Seoul 을 설정했다면 이 작업을 할 필요는 없다. 하지만 또 한다고 해서 문제되지는 않는다.
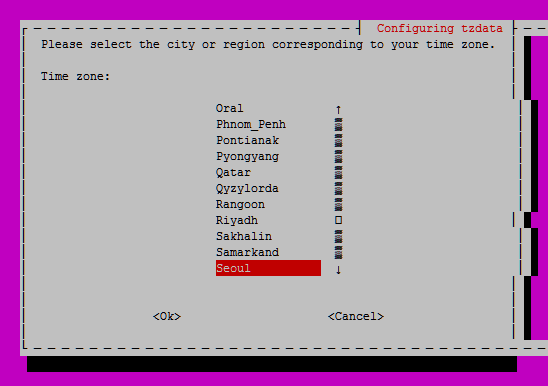
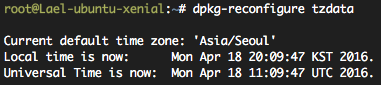
- 데비안 패키지 재설정 TimeZone Data 를 실행한다.
#dpkg-reconfigure tzdata
GUI 환경이 나올 텐데, 순서대로 Asia - Seoul 을 선택하면 된다.
7) Hostname 설정
이 서버에 이름을 정하는 것이다. 이름을 잘 정해 두어야 나중에 다중 서버작업을 할 때 헷갈리지 않는다.

위의 뜻은 “li599-115 서버에 root 사용자” 라는 뜻이다.
서버 이름은 FQDN(Fully Qualified Domain Name)을 쓰는 것이 좋다.
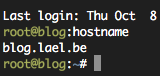
참고로 라엘이의 이 블로그 서버의 hostname은 blog.lael.be 이다.
#vi /etc/hostname
빈 파일일 건데(또는 기존 hostname이 쓰여있을것임.) 원하는 이름으로 바꾼다.
권장하는 단어는 이 서버에 연결될 대표 도메인이다. 예를 들어 blog.lael.be 같은 것.
적용한다.
#hostname -F /etc/hostname
서버에 재 접속하면 적용된 것을 확인 할 수 있을 것이다.
hostname 값은 서버작업자에게 서버이름을 알려주는 역할을 하며, 아무 의미없는 글자를 적어도 된다.
일부 sendmail 같은 프로그램에서 다른 서버와 통신시 사용하기도 한다.
- hostname 을 FQDN 으로 설정하는 것을 권장하지만, 외부와 연결이 없는 서버이거나 자신이 쓰고 싶은 이름이 있다면 (팀명이나, 회사명, 서비스명 등) 그것으로 해도 된다.
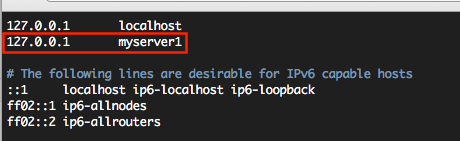
예를 들어 myserver1, new1111 같이 자신이 하고 싶은대로 정했다고 한다면, 서버의 /etc/hosts 에 해당 이름을 등록해두도록 하자.
hostname 이 유효한 도메인 네임일 경우에는 이 작업(/etc/hosts)을 건너뛰세요.
127.0.0.1 myserver1
추가) 메일 발송프로그램 설치하기
많은 프로그램에서 mail() 함수를 사용한다. 이 함수는 서버의 sendmail 프로그램에게 메일발송을 요청한다.
메일문의, 가입시 환영메일, 비밀번호 찾기 메일, 이메일인증 등 널리 사용된다. 서버가 메일 발송을 할 수 있게 sendmail 을 설치하자.
# apt-get install sendmail
이것은 오직 웹사이트에서 메일을 보내기 위한 것이다.
아이디@당신의도메인.com 같은 것을 하고 싶다면 절대로 직접 구축하려고 하지 말고 구글앱스, 도메인 구입처, 클라우드서버 업체의 메일호스팅, 서버호스팅업체의 메일호스팅 을 사용하도록 하자.
# vi /etc/mail/local-host-names
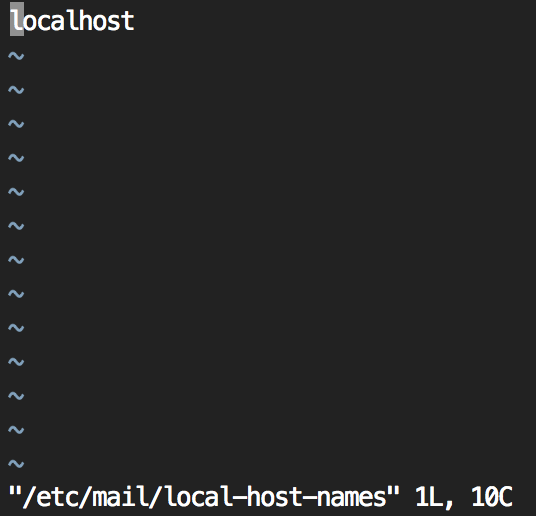
localhost 를 제외하고 나머지 항목은 지운다. 이곳에 쓰여진 도메인은 sendmail 발송시 목적 메일서버조회(mx record query)를 하지않고 로컬로 보낸다.
8) Apache2 설치
#apt-get install apache2
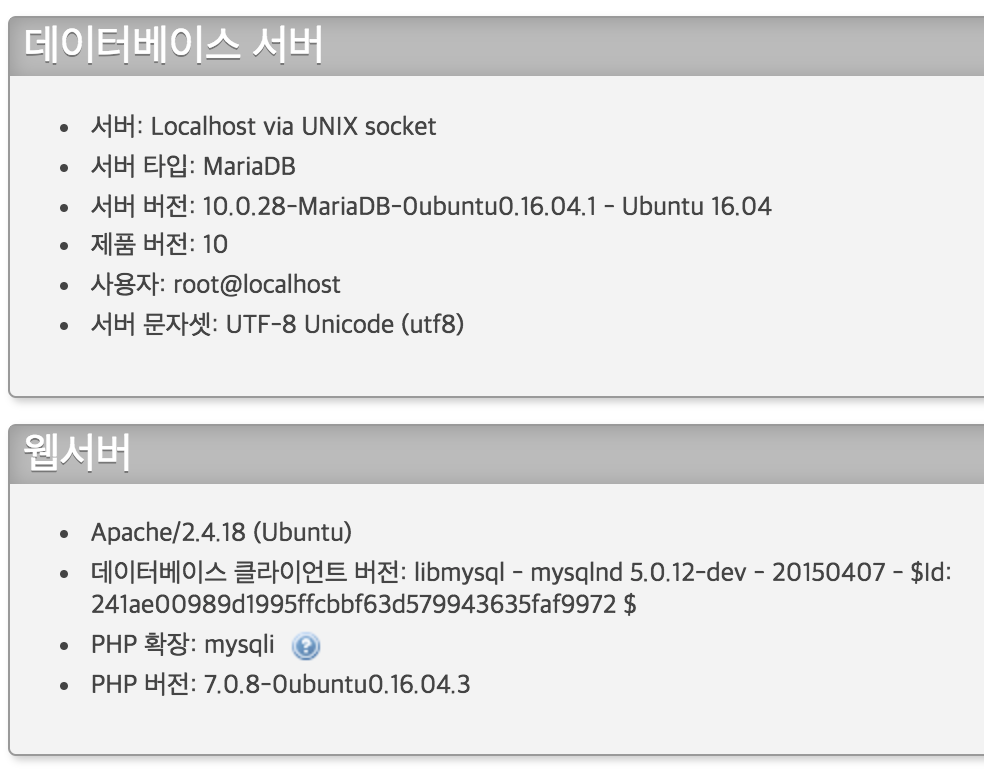
16.04 LTS 에서는 apache 2.4.x 가 설치된다. (2016년 4월 21일 현재 최신버전은 Apache 2.4.18 이다.)
가끔씩 apt-get update 및 apt-get upgrade 를 실행하면 아무런 문제없이 최신버전으로 업데이트 될 것이다.
설치가 완료되면 자동적용 및 시작된다.
버전체크
apache2 -v

확인해본다.
http://256.123.213.213 (서버의아이피)
웹브라우져에 기본 설명페이지가 뜨면 성공.
(참고로 기본으로 보여지는 파일은 /var/www/html/index.html 이다.)
기본 파일을 지운다.
#rm /var/www/html/index.html
기타 주로 사용되는 모듈을 활성화, 필요없는 모듈은 비활성화 한다.
아래 모듈에 대한 자세한 설명은… 생략한다.
사용에 문제가 발생하지 않는 최상의 방식이라고 이해하면 된다.
#a2enmod rewrite #a2enmod headers #a2enmod ssl #a2dismod -f autoindex
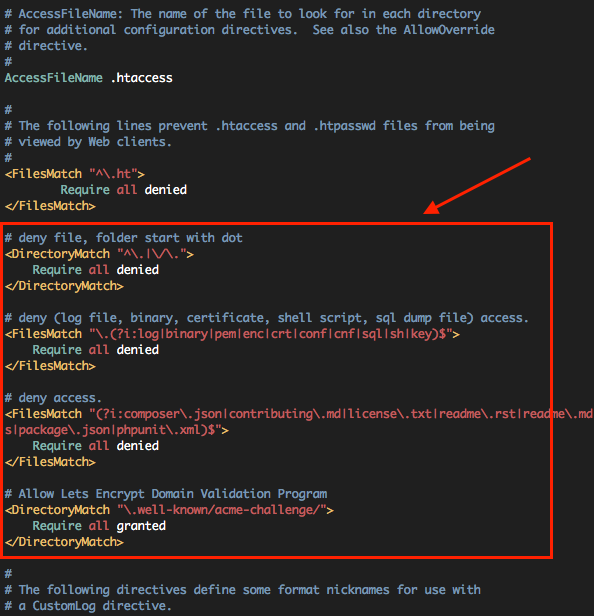
#추가 보안패치. (.git, .svn, .env 등 dot로 시작하는 파일 및 폴더 보호, Web Access가 되어서는 안될 파일들의 접근 제어)
# vi /etc/apache2/apache2.conf
파일 중간의 <FilesMatch “^\.ht”> 구문 다음에 추가한다.
/etc/apache2/apache2.conf 설정파일 중간에 추가
|
1 2 3 4 5 6 7 8 9 10 11 12 13 14 15 16 17 18 19 |
# deny file, folder start with dot <DirectoryMatch "^\.|\/\."> Require all denied </DirectoryMatch>
# deny (log file, binary, certificate, shell script, sql dump file) access. <FilesMatch "\.(?i:log|binary|pem|enc|crt|conf|cnf|sql|sh|key|yml|lock|gitignore)$"> Require all denied </FilesMatch>
# deny access. <FilesMatch "(?i:composer\.json|contributing\.md|license\.txt|readme\.rst|readme\.md|readme\.txt|copyright|artisan|gulpfile\.js|package\.json|phpunit\.xml|access_log|error_log|gruntfile\.js|bower\.json|changelog\.md|console|legalnotice|license|security\.md|privacy\.md)$"> Require all denied </FilesMatch>
# Allow Lets Encrypt Domain Validation Program <DirectoryMatch "\.well-known/acme-challenge/"> Require all granted </DirectoryMatch>
|
9) PHP 7.4 설치
PHP 5 를 설치하고 싶으시면 Ubuntu 14.04 LTS 를 설치하세요.
--
#apt-get install php

20.04 에서는 PHP 7.4.x 가 설치된다.
PHP-아파치 연동모듈 설치
#apt-get install libapache2-mod-php7.4
기타 주로 사용되는 모듈을 설치한다.
- 암호화 모듈
#apt-get install php-mcryptcomputingforgeeks.com/install-php-mcrypt-extension-on-ubuntu/
- 다국어 처리모듈
#apt-get install php-mbstring
- 이미지처리 모듈
#apt-get install php-gd
- 원격지 정보 불러는 모듈 (워드프레스, 드루팔 등에서 쓰임)
#apt-get install php-curl php-xml
-추가로 설치하고 싶은 모듈이 있으면
#apt-cache search php-
라고 입력해서 설치가능한 패키지를 검색후 install 하도록 하자.

- 아파치 재시작(적용을 위해서)
#service apache2 restart
버전체크
#php -v
PHP 7.0.4-7ubuntu2 (cli) ( NTS )
Copyright (c) 1997-2016 The PHP Group
Zend Engine v3.0.0, Copyright (c) 1998-2016 Zend Technologies
with Zend OPcache v7.0.6-dev, Copyright (c) 1999-2016, by Zend Technologies
7.0.4 버전이다. (당신이 설치한 버전은 이것보다 높을 것이다.)
10 - 1) MariaDB 설치
mysql 과 mariadb 는 완전 API 호환된다.
#apt-get install mariadb-server
MariaDB 10.0.24 이 설치된다.
MariaDB 초기화.
14.04 LTS까지는 자동으로 처리되던 작업인데.. 분리되었다.
아무튼 데이터베이스 초기화 작업을 하도록 하자.
다음의 명령어 실행하자.
/usr/bin/mysql_secure_installation
모르면 엔터 누르면 된다. (비밀번호만 설정하고 나머지는 엔터)
잘못한 것 같으면 위 명령어를 다시 실행하면 된다.
:: root 의 인증 플러그인 정보 제거하기
MySQL에 플러그인이라는 개념이 생겼다. 그 중 하나가 서버사이드 인증이다.
예를들어 Linux의 myuser1 사용자와 MySQL(MariaDB)의 myuser1 과 연결이 되는 경우이다. (비밀번호 필요없이 쉘인증)
root 사용자가 기본값으로 unix_socket Auth Plugin 이 설정되어 있는데… 이건 실 사용에 많은 불편함을 준다. 기존과 같이 비밀번호 인증 방식으로 바꾸도록 하자.
Linux root 사용자로 로그인한 상태에서
# mysql
(현재는 unix_socket 인증방식이라서 Linux root 사용자는 MySQL(MariaDB) root 계정에 비밀번호 없이 로그인 할 수 있다)
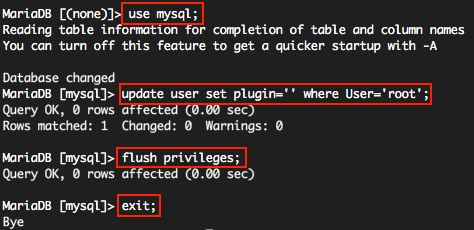
use mysql; update user set plugin='' where User='root'; flush privileges; exit;
-----------
#apt-get install php-mysql
DB 연동모듈 설치. 완전 호환되기 때문에 mysql 이라고 해도 mariadb 사용가능.
MYSQL 콘솔 클라이언트 버전체크
#mysql -V mysql
Ver 15.1 Distrib 10.0.24-MariaDB, for debian-linux-gnu (x86_64) using readline 5.2
10 - 2) 기본 언어셋 설정(중요)
이 단계를 건너뛰면 DB가 latin1 으로 생성되며 추후 DB작업에 문제가 생길 수 있다.
#vi /etc/mysql/mariadb.conf.d/50-server.cnf
(vi 에디터 사용방법을 모른다면 ftp 클라이언트를 사용하여 서버에 로그인 후 해당파일을 수정하고 덮어쓰기한다.)
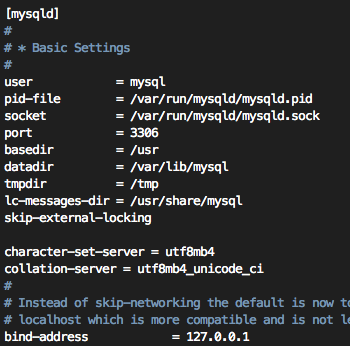
[mysqld] 항목에 다음 2 줄을 추가한다.
2015년도 부터는 아래와 같이 utf8mb4 속성을 사용하세요.
이 속성은 utf8확장입니다. 기존의 모든 utf8과 상위 호환됩니다. (utf8 에서 utf8mb4 로의 변환은 손실이 일어나지 않습니다.)
utf8mb4 속성은 스마트폰 이모티콘 문자(emoji)를 저장할 수 있습니다.
자세한 설명은 이곳에(https://blog.lael.be/post/917) 있습니다.
/etc/mysql/mariadb.conf.d/50-server.cnf 에 추가
|
1 2 |
character-set-server = utf8mb4 collation-server = utf8mb4_unicode_ci
|
변경사항 적용
#service mysql restart
11) PHP 권한 설정
웹 서비스 구동시 발생할 수 있는 Nobody 퍼미션 관련 문제를 해결하기 위해 관련 프로그램을 설치한다.
이 세팅을 하면 shell의 권한과 sftp의 권한과 web의 권한이 동일하게 취급되며 보안도 좋게된다.
순서대로 쓰면 된다.
# apt-cache search mpm-itk
libapache2-mpm-itk - multiuser module for Apache

#apt-get install libapache2-mpm-itk
#chmod 711 /home
#chmod -R 700 /home/*
(/home/* 안에 아무파일도 없을 경우 마지막 구문은 에러가 날 수 있다. 에러가 나면 무시하도록 하자.)
11-1) PHP 실행확장자 변경
php 를 해석하는 확장자가 꽤 많이 있다.
#vi /etc/apache2/mods-available/php7.4.conf

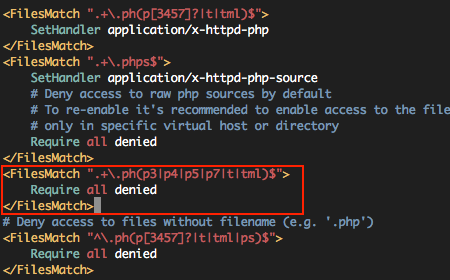
.php .php3 .php4 .php5 .php7 .pht .phtml 확장자 파일이 기본적으로 php를 해석할 수 있게 되어있다.
웹페이지에서 파일업로드 구현시 이 확장자 파일을 제대로 막아주지 못하면 사이트가 위험하게 된다.
.php 를 제외한 나머지의 접근을 차단하자.
|
1 2 3 |
<FilesMatch ".+\.ph(p3|p4|p5|p7|t|tml)$"> Require all denied </FilesMatch>
|
--------------------------------------------
적용을 위해서 아파치 재시작
#service apache2 restart
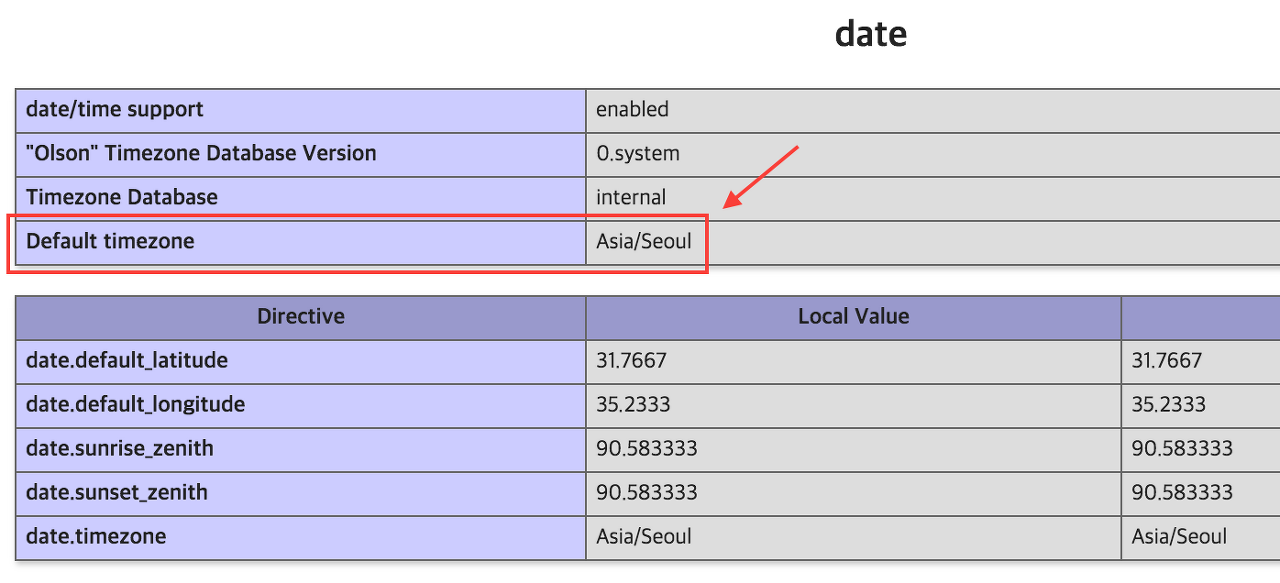
11-2) PHP Default timezone 설정하기.
이 값을 설정하지 않으면 시스템 timezone 을 사용합니다.
PHP Default timezone 을 설정하는 것은 필수는 아니지만 매우 권장하는 작업입니다. 설정해주세요.
동일한 작업을 2개의 파일에 적용해 주어야 합니다.
이건 Apache2 - PHP 일때 참조하는 설정파일입니다.
#vi /etc/php/7.4/apache2/php.ini
이건 Cron이나 Console에서 PHP를 직접실행할때 참조하는 설정파일입니다.
#vi /etc/php/7.4/cli/php.ini
date.timezone 값을 찾아서 주석을 제거하고 시간을 설정해주세요.
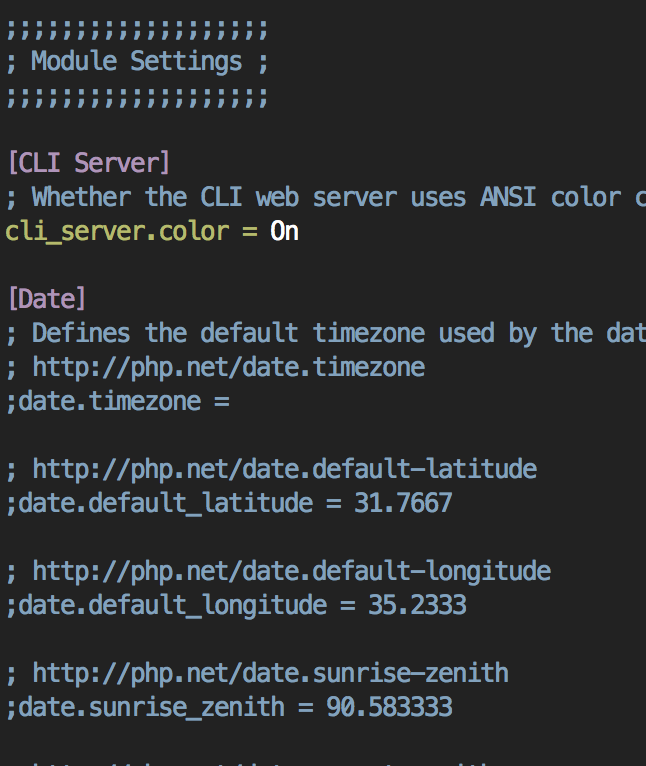
이 값을 찾아서
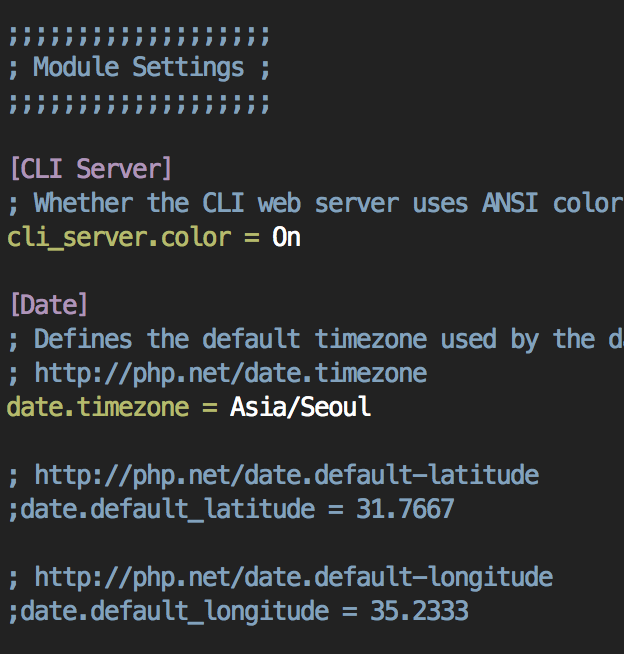
이렇게 변경.
#service apache2 restart
나중에 mytest.php 파일을 만들고 웹브라우져에서 실행시킨 뒤 위와 같이 설정되어 있으면 정상이다.
mytest.php
|
1 |
<?php phpinfo(); ?>
|
Default timezone 이 설정되어 있으면 정상.
12) 계정생성 및 동작테스트
원래 표준명령어는 useradd 이지만 ubuntu는 사용하기 좋게 adduser 를 지원한다.
리눅스 관련 서적을 보면 둘다 계정생성용 명령어라고 되어있다.
쉬운 설정을 위해 adduser를 사용
#adduser myuser1
(참고로 위와 반대동작을 하는 계정삭제 명령어는 - 계정을 삭제하고 홈디렉토리도 삭제함 -
#userdel -r myuser1
입니다.)
보통 웹루트는 홈디렉토리에 하지 않습니다.
저는 주로 www 디렉토리를 사용합니다.사용자변경 후 www 디렉토리를 생성하고 빠져나오기
#su -l myuser1
#mkdir www
#exit
13) 웹사이트 Apache 환경설정파일 작성
#16.12.20 설정 가이드가 추가됨
환경설정을 쉽게하도록 도와주는, 환경설정 생성기가 추가되었습니다.
https://webmaster.cafe/tools/apache-conf-generator/
다음의 내용을 작성한다.
아래 예제에서는 사이트 환경설정파일명을 lael.be 로 가정하고 진행한다.
당신의 도메인, 사용자 아이디, 별도의 구분단어로 설정해서 사용하도록 하자.
#vi /etc/apache2/sites-available/lael.be.conf
/etc/apache2/sites-available/lael.be.conf 에 저장한다.
|
1 2 3 4 5 6 7 8 9 10 11 12 13 14 15 16 17 18 19 20 21 22 23 |
<VirtualHost *:80> #main domain ServerName lael.be
#additional domain ServerAlias www.lael.be ServerAlias my-anotherdomain.com
#document Root DocumentRoot /home/myuser1/www/
#additional setting <Directory /home/myuser1/www/> Options FollowSymLinks MultiViews AllowOverride All require all granted </Directory>
AssignUserID myuser1 myuser1
ErrorLog ${APACHE_LOG_DIR}/lael.be-error.log CustomLog ${APACHE_LOG_DIR}/lael.be-access.log combined </VirtualHost>
|
ServerAlias 는 사용안하면 빼도 되는 줄이다.
#15.09.16 추가
당신이 만약 SSL(https) 를 적용하고자 한다면 lael.be.conf 파일 하단에 다음의 코드를 추가하세요. 즉 VirtualHost 영역을 하나 더 추가.
|
1 2 3 4 5 6 7 8 9 10 11 12 13 14 15 16 17 18 19 20 21 22 23 24 25 26 27 28 29 30 31 32 33 34 35 36 37 38 |
<VirtualHost *:443> #main domain ServerName lael.be
#additional domain ServerAlias www.lael.be ServerAlias my-anotherdomain.com
#document Root DocumentRoot /home/myuser1/www/
#additional setting <Directory /home/myuser1/www/> Options FollowSymLinks MultiViews AllowOverride All require all granted </Directory>
AssignUserID myuser1 myuser1
ErrorLog ${APACHE_LOG_DIR}/lael.be-error.log CustomLog ${APACHE_LOG_DIR}/lael.be-access.log combined
Header always set Strict-Transport-Security "max-age=31536000"
SSLEngine on
SSLProtocol all -SSLv2 -SSLv3
SSLCipherSuite ECDHE-RSA-AES128-GCM-SHA256:ECDHE-ECDSA-AES128-GCM-SHA256:ECDHE-RSA-AES256-GCM-SHA384:ECDHE-ECDSA-AES256-GCM-SHA384:DHE-RSA-AES128-GCM-SHA256:DHE-DSS-AES128-GCM-SHA256:kEDH+AESGCM:ECDHE-RSA-AES128-SHA256:ECDHE-ECDSA-AES128-SHA256:ECDHE-RSA-AES128-SHA:ECDHE-ECDSA-AES128-SHA:ECDHE-RSA-AES256-SHA384:ECDHE-ECDSA-AES256-SHA384:ECDHE-RSA-AES256-SHA:ECDHE-ECDSA-AES256-SHA:DHE-RSA-AES128-SHA256:DHE-RSA-AES128-SHA:DHE-DSS-AES128-SHA256:DHE-RSA-AES256-SHA256:DHE-DSS-AES256-SHA:DHE-RSA-AES256-SHA:AES128-GCM-SHA256:AES256-GCM-SHA384:AES128-SHA256:AES256-SHA256:AES128-SHA:AES256-SHA:AES:CAMELLIA:DES-CBC3-SHA:!aNULL:!eNULL:!EXPORT:!DES:!RC4:!MD5:!PSK:!aECDH:!EDH-DSS-DES-CBC3-SHA:!EDH-RSA-DES-CBC3-SHA:!KRB5-DES-CBC3-SHA
SSLHonorCipherOrder on
SSLCertificateFile "/home/myuser1/ssl/mysite_ssl.crt" SSLCertificateKeyFile "/home/myuser1/ssl/mysite_ssl.key" SSLCertificateChainFile "/home/myuser1/ssl/mysite_ssl.certchain.crt"
</VirtualHost>
|
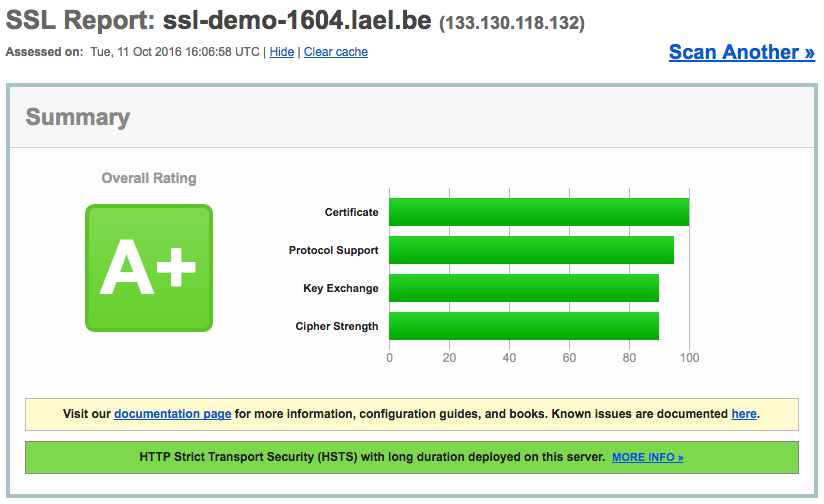
https://www.sslshopper.com/ssl-checker.html#hostname=blog.lael.be (SSL Chain test - 인증서가 올바르게 설치되어 있는지)
https://www.ssllabs.com/ssltest/analyze.html?d=blog.lael.be (SSL Algorithm test - 안전한 암호화 통신이 설정되어 있는지)
Chain test 는 모두 Valid 이어야하고, SSL Algorithm test 는 A 이상이면 정상적인 운영이 가능하다.
라엘이가 여러 설정 값에 대해서 테스트를 해 보았고, 최적의 권장설정 값을 위와 같이 적어두었으니 그대로 쓰면 된다.
위의 설정값으로 SSL을 설치하면 A+등급을 받을 수 있을 것이다.
.
인증서 적용 테스트는 위의 사이트를 이용하여라.
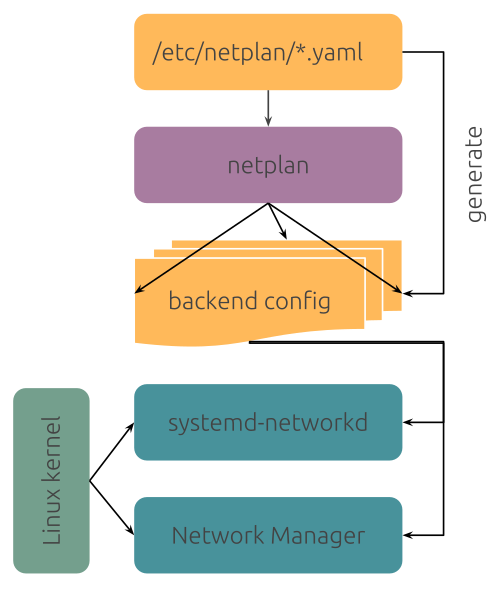
인증서 체인 파일이란 “인증서에 대한 인증서” 파일이다.
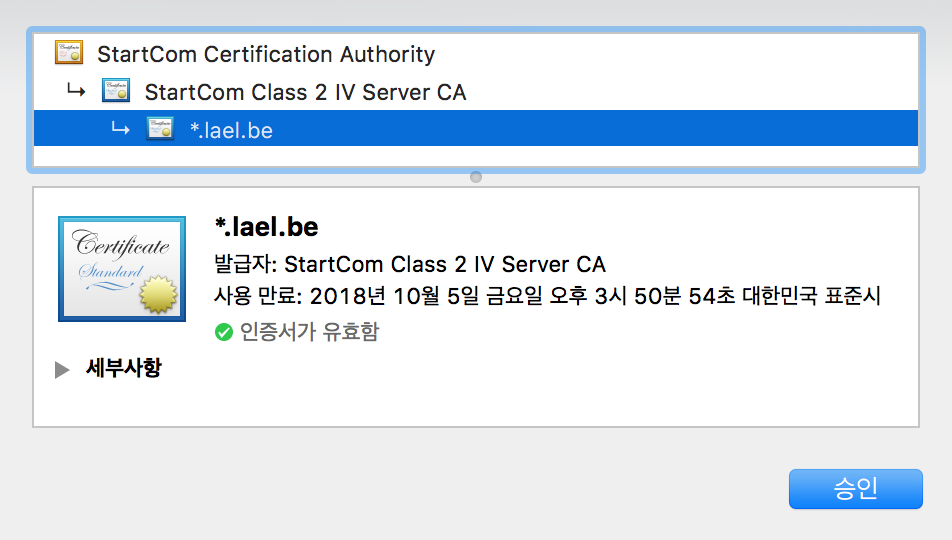
< 그림 : 이 블로그는 위의 단계를 거쳐 인증된다. 이것을 체인 인증 이라고 한다. >
대통령이 당신을 인증할 때 직권으로 인증하는 것이 아니라, 대통령 -> 서울시장 -> 강남구청장 -> 삼성동장 -> 당신 의 단계를 거친다. 검증하려면 모든 단계의 보증 증서를 제공해야 하는 것이다.
인증서 파일에는 삼성동장 -> 당신 의 정보가 들어있고, (암호화 통신시 공개됨)
인증서 키 파일에는 암호화 통신을 위한 정보가 들어있고 (은행 보안카드 로 비유. 외부에 공개되지 않음.)
인증서 체인 파일에는 대통령 -> 서울시장, 서울시장 -> 강남구청장, 강남구청장 -> 삼성동장 의 정보가 들어있다. (체인 인증이라고 한다. 연결고리 인증)
인증서 체인을 올바르게 작성하지 않으면 Firefox 브라우저와 Android Chrome 브라우저에서 “인증서 정보부족” 오류가 발생하게 된다.
14) 사이트 활성화 및 적용
명령어는
#a2ensite 사이트환경설정파일명
입니다.
#a2ensite lael.be
(참고로 사이트 비활성화는
#a2dissite lael.be
입니다.)
- 아파치 설정 다시 불러오기(적용을 위해)
#service apache2 reload
15) 연동테스트
apache 와 php, 그리고 mariadb 를 모두 사용하는 프로그램을 실행시켜보자.
phpmyadmin 공식사이트 : https://www.phpmyadmin.net/
설치 못하시는 분이 꽤 있으셔서 따로 설치법을 적습니다.
여러 설치방법이 있겠지만 저는 다음과 같이 설치합니다.
압축해제 프로그램 설치# apt-get install unzip
압축파일 다운로드# cd /var/www/html
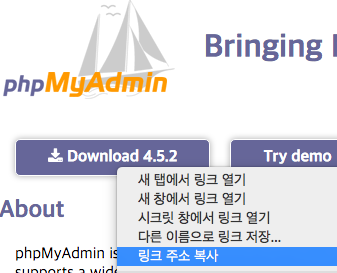
https://www.phpmyadmin.net/ 사이트로 이동 후 위의 그림과 같이 입력하여 최신버전을 설치할 수 있도록 하자.
이 글에서는 글 작성 시각 현재 최신버전인 4.5.2 를 설치할 것이다. phpmyadmin 은 매우 견고하게 만들어진 프로그램으로써 4.5.2를 설치해도 보안취약점이 있지는 않겠지만 최신버전을 설치하는 습관을 기르도록 하자. (혹시나 말하지만, Alpha나 Beta 같은 개발자-최신버전을 설치하라는 뜻이 아니라 널리 사용되어 검증된 Release Channel 최신버전 를 사용하라는 것이다.)
# wget https://files.phpmyadmin.net/phpMyAdmin/4.5.2/phpMyAdmin-4.5.2-all-languages.zip
압축해제
# unzip phpMyAdmin-4.5.2-all-languages.zip
폴더 이름변경
# mv phpMyAdmin-4.5.2-all-languages phpMyAdmin
다운받은파일 삭제
# rm phpMyAdmin-4.5.2-all-languages.zip
도메인주소 말고 서버의 아이피를 입력해야 기본사이트로 들어갈 수 있다.
만약 기본사이트 이외의 사이트에 설치하고 싶다면 /var/www/html 위치 대신 /home/myuser1/www 같은 곳에 phpmyadmin 코드를 넣도록 하자.
http://111.222.333.444/dbmyadmin/
[TIP] 간혹 방금 설치한 디비의 root 비밀번호가 기억이 안나는 분들도 있을 것이다. 이 경우에는 다음의 명령어를 사용하여 mariadb 를 재설치 하도록 하자.
- 제거
# apt-get purge mariadb-server
- 설치
# apt-get install mariadb-server
- 재부팅
복잡한 세팅이 끝났으니 한번 숨을 고르고 가자.
# reboot
재부팅 후에 phpinfo 페이지와 phpmyadmin 가 잘 실행된다면 “재부팅이 가능한 서버” 라고 볼 수 있다.
16) Apache 추가 보안 설정
- 기본 언어셋 설정
#vi /etc/apache2/conf-available/charset.conf
기본 언어값 UTF-8 에 대해서 주석처리되어 있을 텐데 주석(#)을 제거해 준다.

- 추가 보안 설정
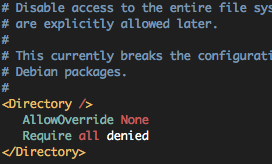
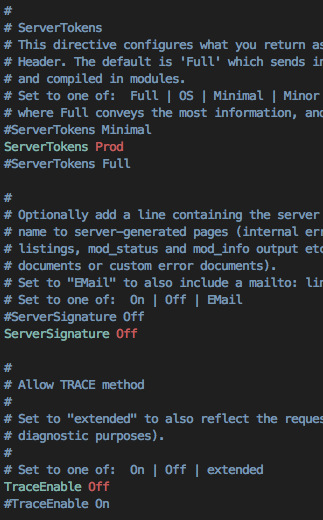
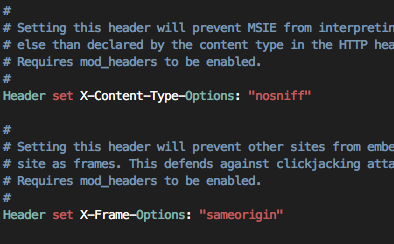
#vi /etc/apache2/conf-available/security.conf
매우 권장하는 보안설정이므로 Ubuntu Apache 패키지 제작자가 미리 써두었다.
이미 다 쓰여 있으니까 주석(#) 만 제거하자.
- 아파치 설정 다시 불러오기(적용을 위해)
#service apache2 reload
옵션) SSH 기본 포트번호 변경
#이 작업은 무작위 대입공격(Brutu force attack)의 시도를 차단해줍니다.
보통 IP주소 : 22번 포트를 스캔해서 ssh와 연결되면 무작위 로그인 시도를 하는 프로그램이 엄청 많은데,
포트번호만 바꾸어주어도 방어가 되거든요.
!! IPTABLES 방화벽, SSH 포트번호 변경, Fail2ban 중에서 하나만 적용하세요!!
1) 나는 KS 클라우드 or 아마존 클라우드를 사용하고 있어! -> 클라우드 방화벽 쓰세요 !!
2) 나는 허용된 IP만 서버에 접속하게 할거야 -> IPTABLES !!
3) 나는 사용자의 IP를 특정지을 수 없는데 무차별대입 공격은 방어할거야 -> Fail2ban !!
4) 나는 나만 아는 포트번호로 서버에 접속할 거야 -> SSH 포트변경!!
[개인 프로젝트, 회사의 서비스 -> IPTABLES]
[웹호스팅 -> Fail2ban 또는 SSH 포트변경]
SSH 기본 포트번호인 22번을 다른 번호로 바꿉니다.
기억하기 쉬운 숫자로 변경하세요.
#vi /etc/ssh/sshd_config
Port 22 를 찾아서 임의의 숫자 : 10022, 34522 등 기억하기 쉬운 숫자로 설정.
포트번호는 10000번 이상의 숫자를 선택하시길 권장합니다.
#service ssh restart
옵션) 방화벽 적용하기
방화벽의 중요성을 알고 싶다면
# tailf /var/log/auth.log
를 입력해보도록 하자. (Control + C 를 눌러 프로그램 종료)
별도의 방화벽 설정이 없었다면 벌써 중국에서 서버에 로그인 시도를 하고 있을 것이다.
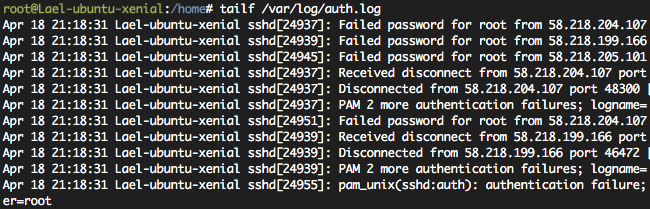
이러한 무차별 로그인 시도를 다음 중 어느 하나를 사용해서 막을 수 있다.
가장 편한 것은 fail2ban 이다. (한줄만 타이핑하면 방어됨)
(https://blog.lael.be/post/858#fail2ban) 로 이동해서 설정하세요.
* 접속자의 IP 가 고정되어 있으면 방화벽 설정을 통해, 특정 아이피에서만 서버에 접속할 수 있도록 설정해주세요.
현재 방화벽 설정 보기. (List)
#iptables -L
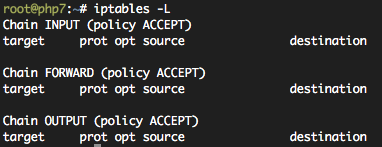
INPUT (서버로 들어오는 것 관리), FORWARD (서버에서 내부망으로 연결관리;잘 안씀), OUTPUT (서버에서 나가는 것 관리)
로 이루어져 있다.
보통 FORWARD와 OUTPUT은 건들이지 않고 INPUT 만 수정한다.
policy ACCEPT 라는 뜻은 아무 조건도 해당하지 않았을 때 ACCEPT 하라는 것이다.
먼저 현재 방화벽 설정을 파일로 저장한다. 언제든 현재의 상태로 되돌릴 수 있기 위해서 이다.
#cd ~
#mkdir firewall_rules
#cd firewall_rules
#iptables-save > 151214.rules 현재 날짜 쓰세요.
이제 방화벽을 복구해 보자.
#iptables-restore < 151214.rules
#iptables -L
>>설정 시작.
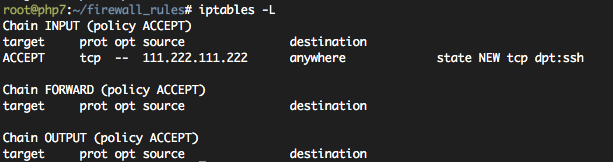
규칙 : 아이피 111.222.111.222 에 대해서 destination port 가 22 이면 ACCEPT 하여라.
#iptables -A INPUT -s 111.222.111.222/32 -p tcp -m state --state NEW -m tcp --dport 22 -j ACCEPT
아이피 바꾸지 마시고 위의 예시 (111.222.111.222) 그대로 입력하세요.
#iptables -L
이제 현재 상태에 대해서 방화벽 설정파일을 다시 생성해보도록 하자.
#iptables-save > 151214.rules
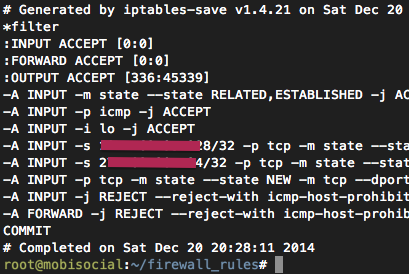
SFTP나 vi, cat 으로 해당 151214.rules 를 열어보자.
열고나서 코드의 뜻을 대충 해석해보아라. (간단하다.)
하단 *filter 부분에
-A INPUT -s 111.222.111.222/32 -p tcp -m state --state NEW -m tcp --dport 22 -j ACCEPT
가 보이는가?
여러분은 이곳에 아래의 코드를 집어넣어야 한다.
순서가 중요하다. IF-ELSE 같이 동작하기 때문에 조건에 맞으면 바로 지정된 동작을 한다.
211.105.192.168 아이피만 지정하고 싶을 때 -> -s 211.105.192.168/32
211.105.192.* 아이피 그룹을 지정하고 싶을 때 -> -s 211.105.192.0/24
211.105.*.* 아이피 그룹을 지정하고 싶을 때 -> -s 211.105.0.0/16
목적지 포트가 22번(ssh) 포트일 때 -> -dport 22
목적지 포트가 80번(http) 포트일 때 -> -dport 80
목적지 포트가 443번(https) 포트일 때 -> -dport 443
아래는
1. 이미 연결된 것은 허용
2. ping 허용
3. loopback 허용
4. 111.222.111.222 의 22번 포트 접근 허용
5. 123.111.123.111 의 22번 포트 접근 허용
6. 80 포트 접근 허용 (-s 옵션이 없으므로 누구나 허용)
7. 443 포트 접근 허용 (-s 옵션이 없으므로 누구나 허용)
8. 차단
9. FORWARD 차단
의 코드이다.
아까 생성한 .rules 파일을 열어서 아래의 코드를 그림과 같이 코드를 추가하여라. 이때 반드시 당신의 아이피를 추가하여라.
추가가 잘못되어도 어차피 1번의 조건에 의해서 당신의 연결이 끊기지는 않겠지만 새로운 연결은 차단될 것이다.
|
1 2 3 4 5 6 7 8 9 |
-A INPUT -m state --state RELATED,ESTABLISHED -j ACCEPT -A INPUT -p icmp -j ACCEPT -A INPUT -i lo -j ACCEPT -A INPUT -s 111.222.111.222/32 -p tcp -m state --state NEW -m tcp --dport 22 -j ACCEPT -A INPUT -s 123.111.123.111/32 -p tcp -m state --state NEW -m tcp --dport 22 -j ACCEPT -A INPUT -p tcp -m state --state NEW -m tcp --dport 80 -j ACCEPT -A INPUT -p tcp -m state --state NEW -m tcp --dport 443 -j ACCEPT -A INPUT -j REJECT --reject-with icmp-host-prohibited -A FORWARD -j REJECT --reject-with icmp-host-prohibited
|
#iptables-restore < 151214.rules
#iptables -L
!!!반드시 현재 쉘 연결을 끊지 말고!!!
현재 연결은 1번 조건에 의해서 반드시 허용이기 때문에 괜찮다.
새로 연결창 띄워서 테스트해 보아라.
만약 원하는대로 동작하지 않는다면 다시 .rules 파일을 수정하고 iptables-restore 하여라.
방화벽 설정이 머리가 아프다면
# iptables -F
로 초기화 하고 내일 다시 시도해 보아라.
이 설정은 재부팅이 되면 초기화 된다.
설정을 지속시키도록 하자.
iptables-persistent 설치
#apt-get install iptables-persistent
Yes (엔터), Yes (엔터)
/etc/iptables 라는 폴더가 생성되고
rules.v4, rules.v6 가 생성된다.
부팅시 실행되는 파일을 갱신하자.
#iptables-save > /etc/iptables/rules.v4
ipv6 차단하기
#vi /etc/sysctl.conf
맨 밑에
|
1 2 3 |
net.ipv6.conf.all.disable_ipv6 = 1 net.ipv6.conf.default.disable_ipv6 = 1 net.ipv6.conf.lo.disable_ipv6 = 1
|
추가.
설정파일 적용
#sysctl -p
검사
#cat /proc/sys/net/ipv6/conf/all/disable_ipv6
1 이면 disable 된 상태이다.

재부팅
#reboot
재부팅 후에 방화벽 규칙이 유지가 되면 성공이다.
#iptables -L
옵션) 계정별 트래픽 양 제한하기. Apache Mod Cband install.
- 2015.06.01. Ubuntu 14.04 LTS 테스트 완료.
- 순간속도(대역폭), 총 전송량(쿼터), 동시접속연결을 제한하는 모듈입니다.
장애가 일어날 것 같은 값들을 Hard Boundary 로 정해놓으면 장애가 일어날 것 같은 환경에서 서버가 잘 돌아가는 것을 볼 수 있을 것입니다.
저도 서버 서비스의 장애를 막기 위해서 실 서비스에 이것을 사용하고 있습니다.
다만 저 같은 경우 분산처리를 해 두었기 때문에 개별 서버에 적용한 제한치보다 실제 서비스는 더 높은 처리를 보여줍니다. (100의 제한을 건 서버 5대에 분산처리하면 전체적으로 500의 제한이 걸린 것 처럼 보이겠죠?)
Mod Cband 는 Apache2 모듈입니다.
다음의 기능이 가능합니다.
1) 대역폭 제한 (Bandwidth limit)
2) 동시 접속자 제한 (Concurrent user)
3) 트래픽 제한 (Transfer quota)
통계 용도로만 사용할 수도 있다.
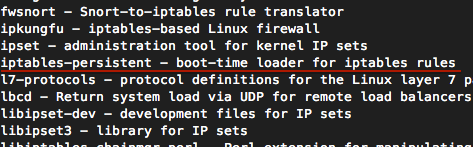
현재 공식사이트가 닫혀있어서 대체할 만한 다운로드 경로를 적는다.
1) mod cband 공식사이트 : http://cband.linux.pl/ (안열림.)
2) mod cband 메인 개발자 블로그 : http://dembol.org/blog/mod_cband/ (다운로드 링크가 동작안함)
3) source forge 링크 : http://sourceforge.net/projects/cband/files/ (최신버전이 아님)
4) 현존하는 것 중에서 가장 최선의 선택 : https://fossies.org/linux/www/apache_httpd_modules/mod-cband-0.9.7.5.tgz/
5) 라엘이 블로그 백업용 파일 (4번과 완전히 동일한 파일) mod-cband-0.9.7.5.zip
1] mod cband 는 apxs 라는 아파치 확장 개발 라이브러리를 필요로 합니다.
#apt-get install apache2-dev
2] apache cband module 다운로드
#wget https://fossies.org/linux/www/apache_httpd_modules/mod-cband-0.9.7.5.tgz
3] 압축을 풀고 설치
#tar -xzvf mod-cband-0.9.7.5.tgz#cd mod-cband-0.9.7.5
3-1] 패치.
apxs 가 업데이트 되면서 변수명이 몇개 바뀌었다.
#vi src/mod_cband.c
찾기 : remote_addr , 바꾸기 : client_addr 1365번째줄, 1회만 치환되어야 함.
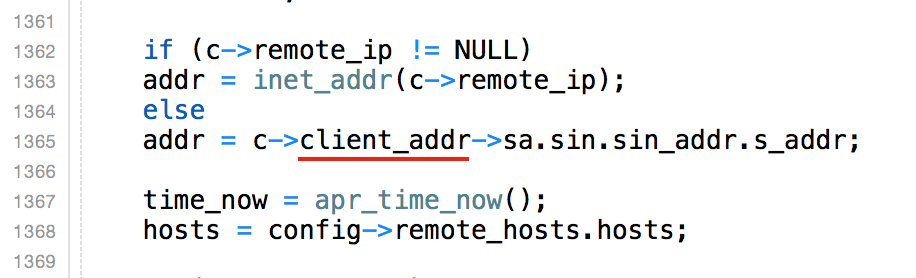
찾기 : remote_ip , 바꾸기 : client_ip 4회 치환되어야 함.
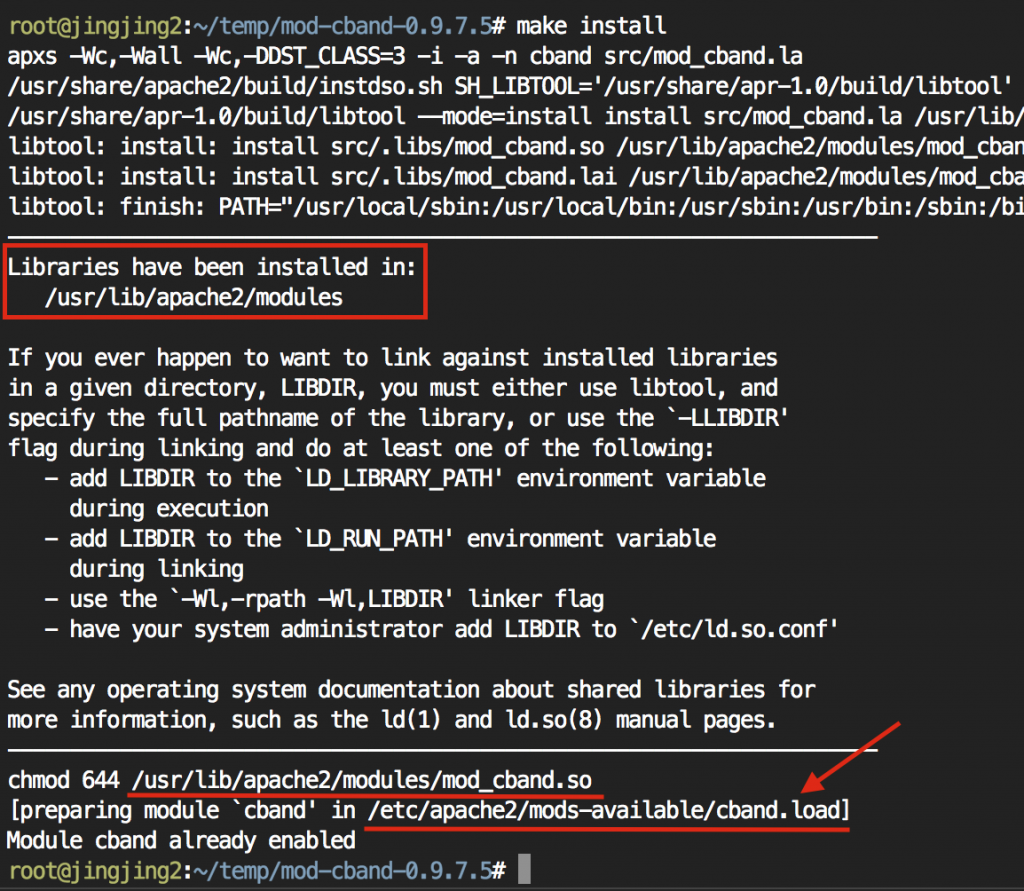
3-2] 설치 계속 진행.#./configure#make#make install
4] cband 모니터링 페이지 생성
#vi /etc/apache2/mods-available/cband.conf
|
1 2 3 4 5 6 7 8 9 10 11 12 13 14 15 |
<IfModule mod_cband.c> <Location /cband-status> SetHandler cband-status AuthName "adminpage" AuthType Basic AuthUserFile /home/.htpasswd require valid-user </Location> <Location /cband-status-me> SetHandler cband-status-me Order deny,allow Deny from all Allow from all </Location> </IfModule> |
#htpasswd -c -m /home/.htpasswd admin
5] 아파치 모듈 켜기
#a2enmod cband
6] 적용을 위해서 아파치 재시작
#service apache2 restart
7] 확인
웹브라우져로
서버아이피/cband-status-me
서버아이피/cband-status
에 들어가 보자.
지금은 모두 무제한이므로 아무 항목이 뜨지 않을 것이다.
8] 설정하기.
https://www.linux.co.kr/home/lecture/?leccode=10588
위의 링크 글을 참조하여 이미 생성해서 사용중인 sites-available 안의 virtualhost 파일을 수정한다.
9] 설정 예제.
각 사이트의 <virtualhost> 구문에 Cband 설정 값을 추가한다. 다 쓸 필요는 없다. 필요한 제한만 두도록 하자.
당신이 웹호스팅을 운영중이라면 CBandLimit 구문과 CBandPeriod 구문을 사용하여라.
당신이 동영상 사이트나, 자료실을 운영중이라면 CBandSpeed 와 CbandExceededSpeed 를 사용하여라.
|
1 2 3 4 5 6 7 8 9 10 11 12 13 14 15 16 17 18 19 20 21 22 |
<VirtualHost *:80> #main domain ServerName lael.be #something #~~~ #~~~
<IfModule mod_cband.c> #4주동안 6GB 전송량 제한을 둠. 초과시 503 Service 에러페이지가 뜸. CBandLimit 6G CBandPeriod 4W #트래픽 조각. 이 상황의 경우 1주일마다 1.5GB 가 보급된다. #트래픽이 CbandPeriod 기간동안 골고루 사용되기를 원할때 설정한다. CBandPeriodSlice 1W
#동영상(flv, mp4)이나 자료실 서비스를 하고 싶을때에만 아래의 속도제한 구문작성 CBandSpeed 500kbps 10 30 CBandExceededSpeed 128kbps 5 15 #CBandScoreboard /var/www/scoreboard/domain.com.scoreboard </IfModule>
</VirtualHost> |
옵션 ) 서버 동시접속자 설정 변경하기. (15.11.20 추가)
다음의 페이지를 많이 참조했습니다. (http://www.zarafa.com/wiki/index.php/Apache_tuning)
문의주시는 분들 중에 간혹 의도치않은 대박(?)이 일어나신 분들이 있더라. 동시접속 튜닝법을 설명하고자 한다.
몇가지 배경지식 설명.
- http 웹페이지는 stateless(connectionless) 입니다. 즉 페이지 불러올 때에만 서버와 연결하고 페이지 로드가 끝난 후에는 연결을 끊습니다.
- 1개의 연결당 평균 메모리 소모량은 20MB 입니다. (라엘이가 관리하는 여러서버의 평균값을 내보았음)
- Ubuntu Apache 의 기본 동시접속자 제한은 150개 입니다. 1000개의 동시접속이 연결되면 150개는 즉시 처리진행되고, 나머지 850개는 대기열에서 대기하다가 차례대로 처리됩니다.
1] 서버 연결당 얼마나 메모리를 소모하는지 확인ps -ylC apache2 | awk '{x += $8;y += 1} END {print "Apache Memory Usage (MB): "x/1024; print "Average Proccess Size (MB): "x/((y-1)*1024)}'

2] 서버에 여유 메모리 자원이 얼마나 있는지 확인
서버를 재부팅한 후에 아파치를 종료후 서버의 메모리를 확인해본다.
# free -m
3] 하드웨어 자원을 고려한 가용 동시연결수 계산
여유 메모리 / 1연결당 메모리 하면 된다.
2000MB free memory 가 있고, 1연결당 20MB 를 사용한다면 = 100개의 동시연결 가능. (300~500 동시접속자 처리가능)
4] 사이트의 필요 동시연결수 계산
450명의 사용자가 있고 3초주기로 페이지 이동이 일어난다고 가정하자. 페이지 출력 실행시간은 2초라고 가정하자.
필요 동시연결수 = 450 / 3 * 2 = 300
5] 동시연결수 설정 변경.# vi /etc/apache2/mods-available/mpm_prefork.conf
MaxRequestWorkers 값을 수정해야 합니다.
ServerLimit 라는 옵션의 기본값이 256이기 때문에 MaxRequestWorkers 값이 256보다 작으면 따로 적을 필요가 없으며, 256보다 크면 그와 같은 값으로 ServerLimit 도 설정해야 합니다.
동시연결 제한 300 예제 설정법.
|
1 2 3 4 5 6 7 8 |
<IfModule mpm_prefork_module> StartServers 5 MinSpareServers 5 MaxSpareServers 10 MaxRequestWorkers 300 ServerLimit 300 MaxConnectionsPerChild 0 </IfModule> |
'Linux > Ubuntu' 카테고리의 다른 글
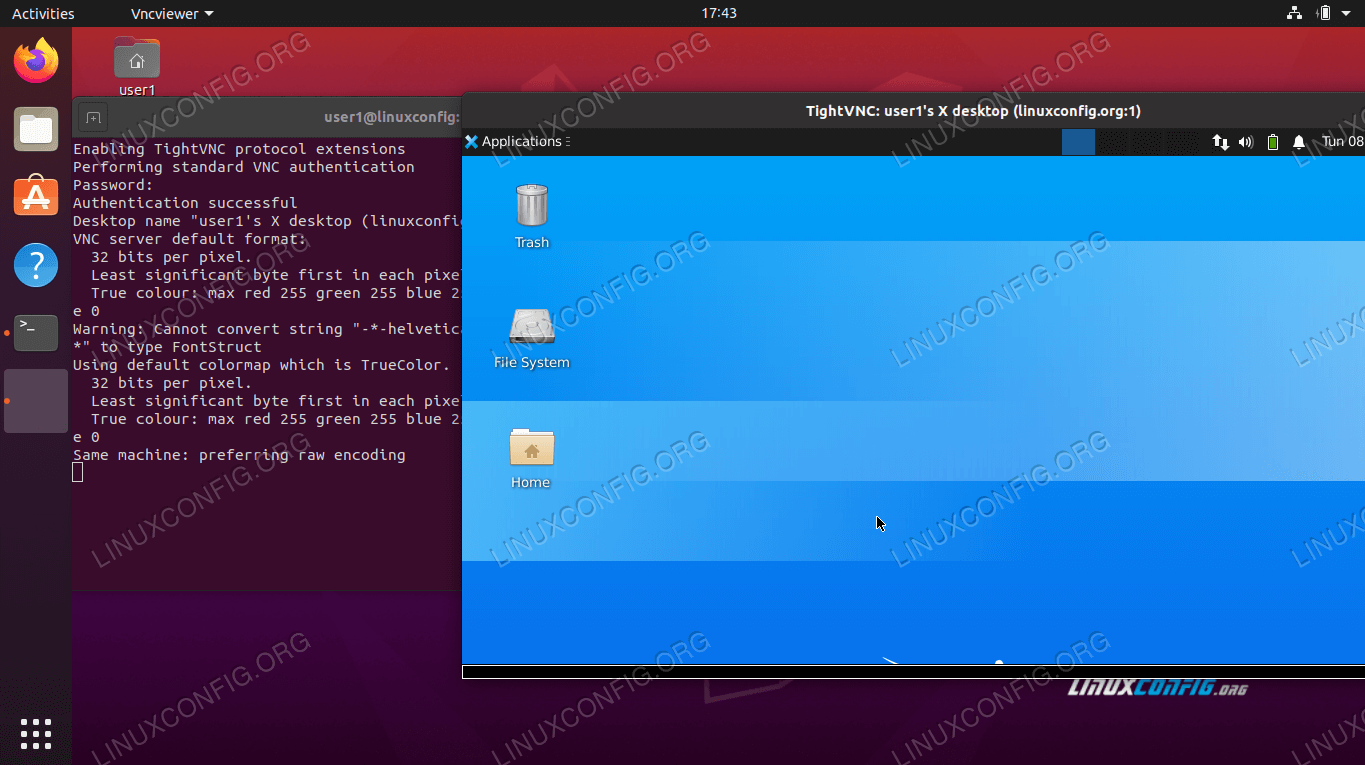
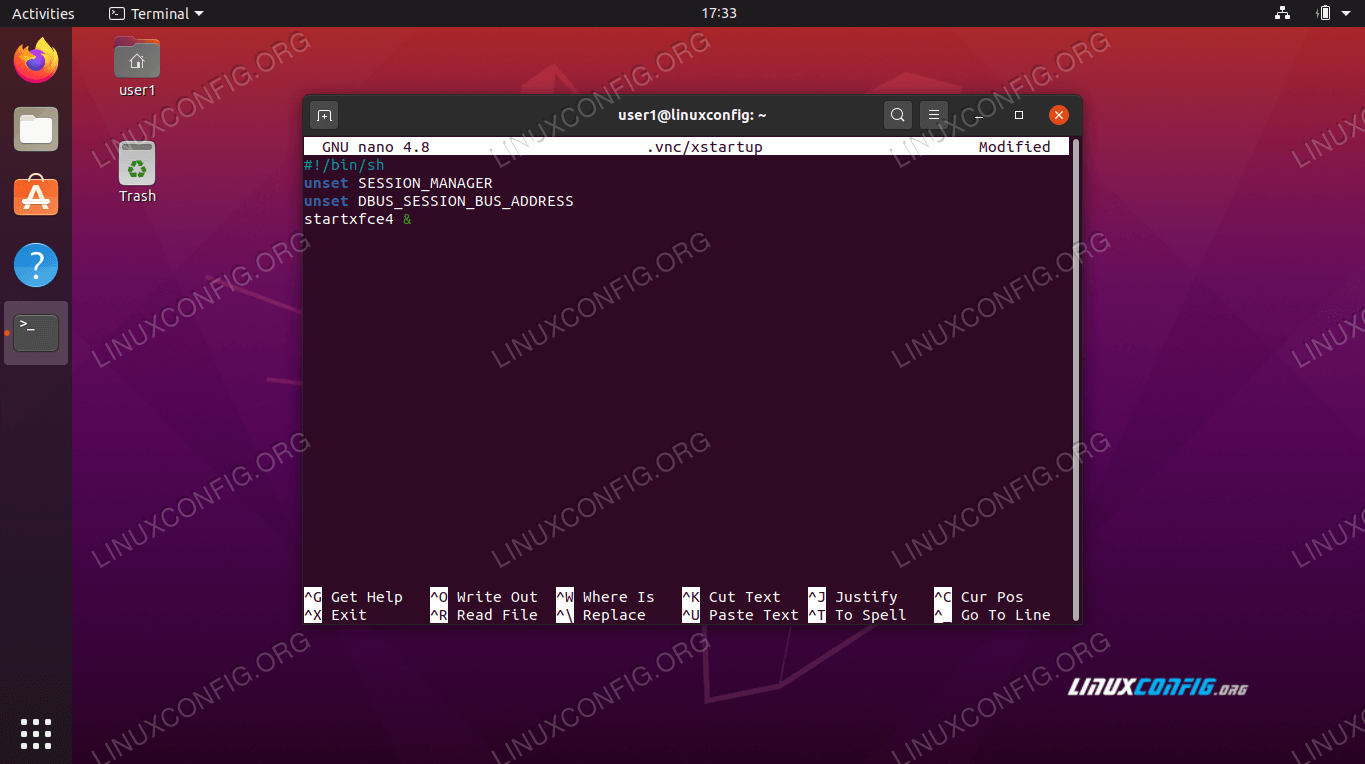
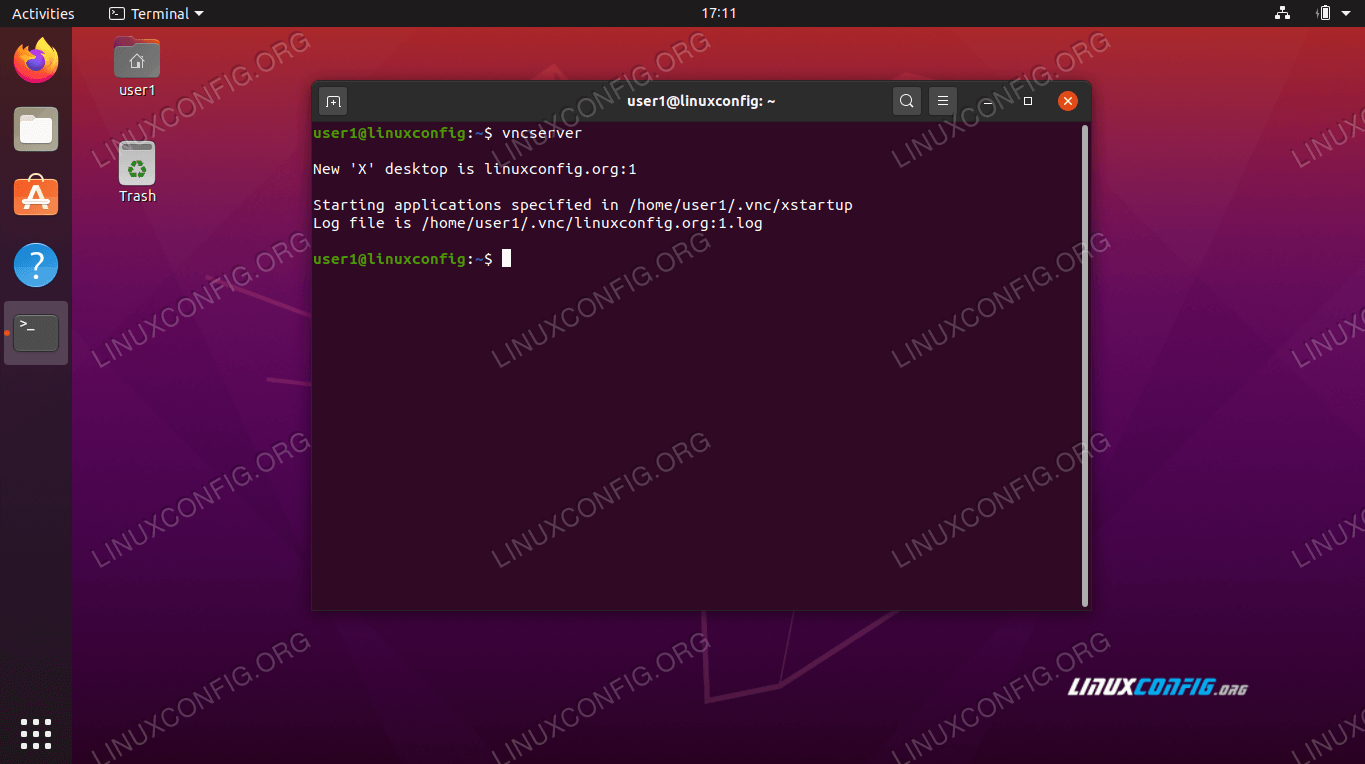
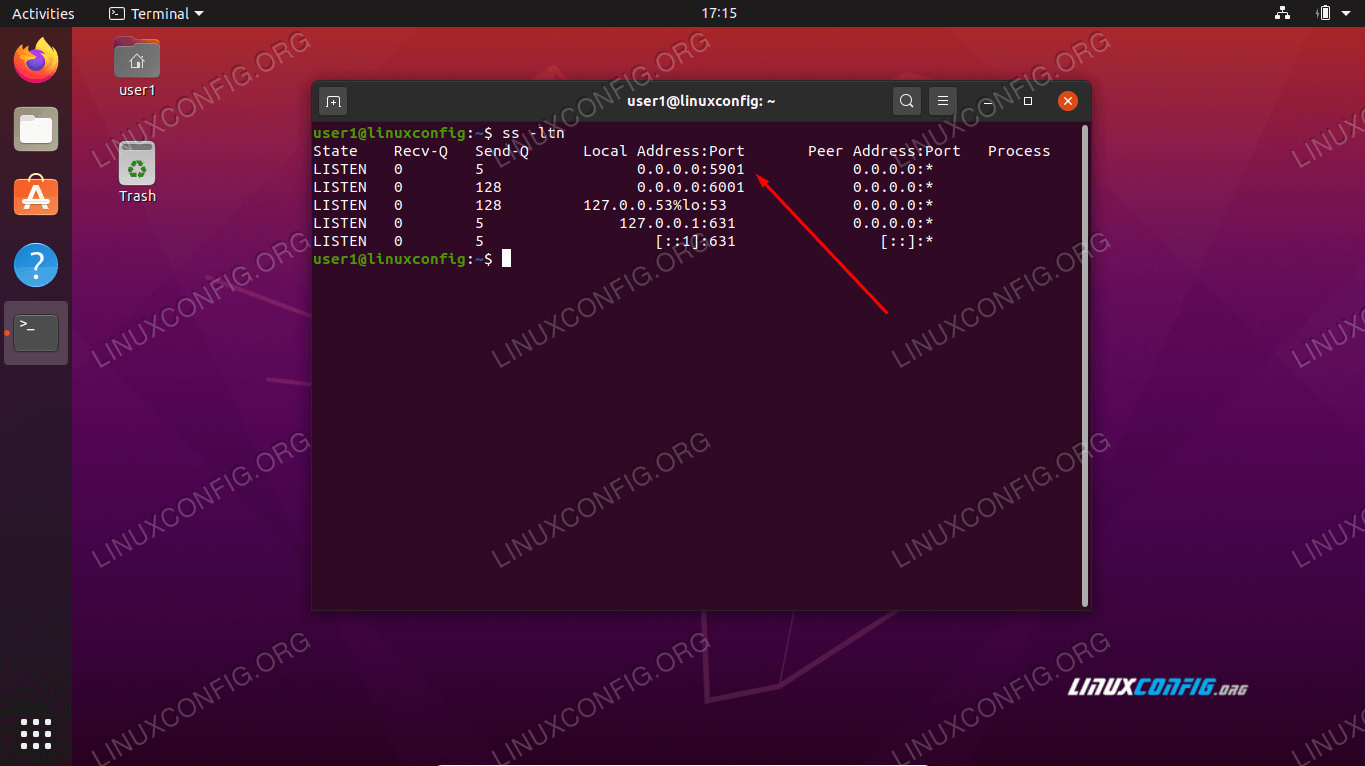
| Ubuntu VNC 설치 (0) | 2021.03.20 |
|---|---|
| Ubuntu Network & WOL (0) | 2021.03.17 |
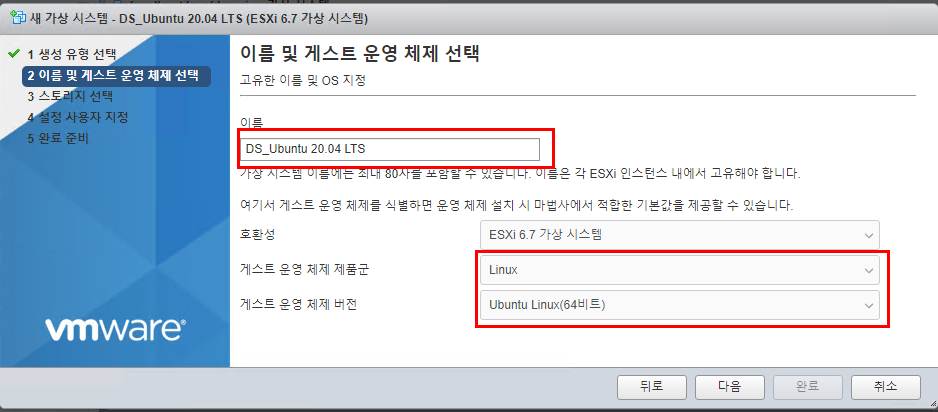
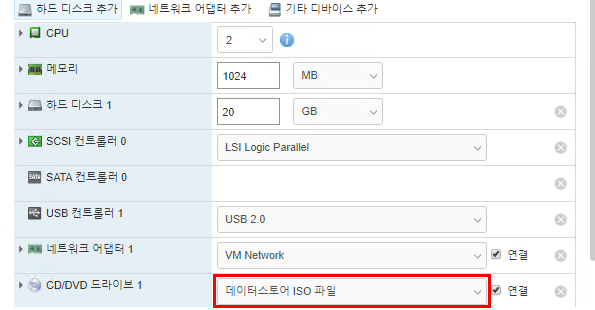
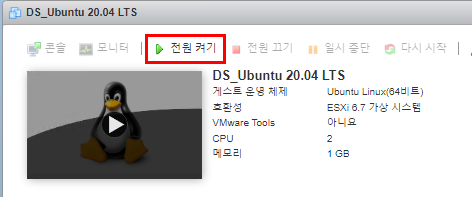
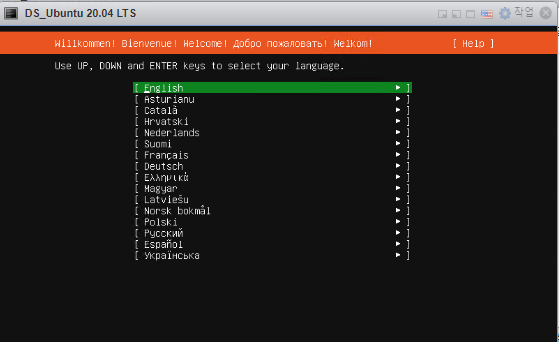
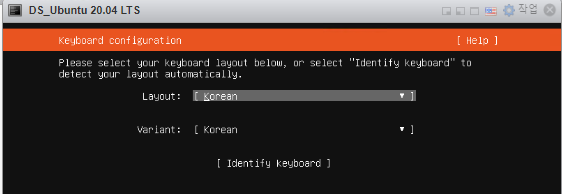
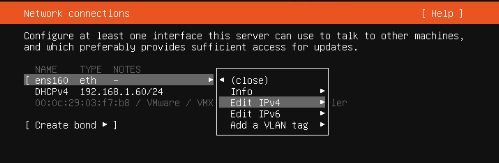
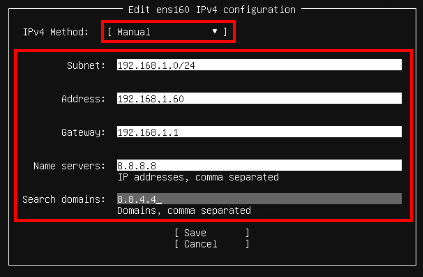
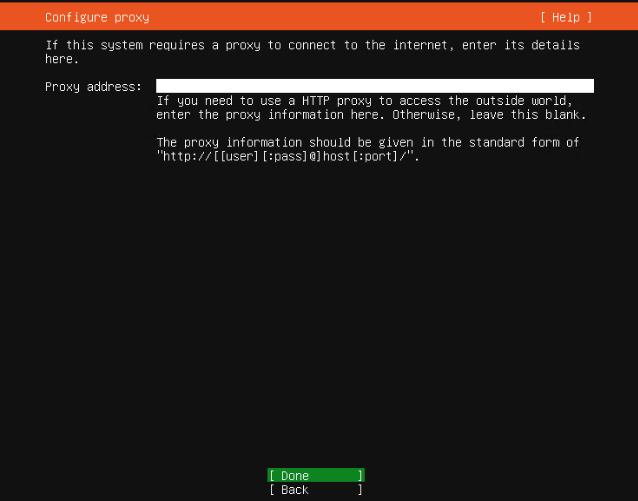
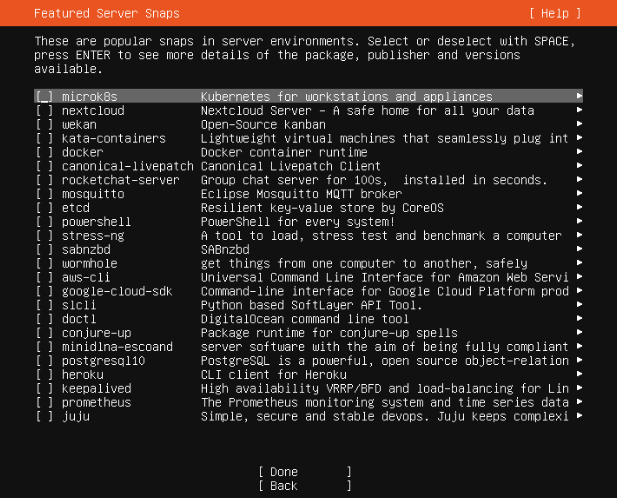
| Ubuntu 20.04 LTS Server 버전 설치 (0) | 2021.03.16 |