VNC is a system that allows you to remotely control another computer. It allows you to relay your mouse and keyboard inputs as if you were physically sitting in front of the system, when in fact you could be on the other side of the world.
In this guide, we will go over the steps to setup a VNC server on yourUbuntu 20.04system. When we're done, you'll be able to access your system remotely from anywhere, provided that your client system and the VNC server have an internet connection.
In this tutorial you will learn:
How to install and configure TightVNC Server
How to install and configure XFCE desktop manager
How to connect to our VNC server with TightVNC Viewer
How to tunnel VNC connections through SSH
How to manage multiple VNC desktops with a Systemd script
Connecting to a VNC server
Software Requirements and Linux Command Line ConventionsCategoryRequirements, Conventions or Software Version Used
Privileged access to your Linux system as root or via thesudocommand.
Conventions
#- requires givenlinux commandsto be executed with root privileges either directly as a root user or by use ofsudocommand $- requires givenlinux commandsto be executed as a regular non-privileged user
Install VNC server
Looking for Linux Systems Analyst !
The UAF Geophysical Institute, is looking for an experienced Linux Systems Analyst to join their team of research cyber infrastructure analysts and engineers. LOCATION:Fairbanks, Alaska, USA
We'll need to install a few packages first. There are multiple options for VNC server software, but we'll be going with TightVNC Server for this tutorial. Along with VNC, we also need a graphical desktop.XFCEis a good choice, so that's what we'll be covering here.
Start byopening a terminaland entering the following command to install TightVNC server and the XFCE desktop manager core files: $ sudo apt install tightvncserver xfce4 xfce4-goodies
After the packages are done installing, we need to configure a username and password that will be used to connect to the VNC server by a client. Create a password with this command:$ vncpasswd
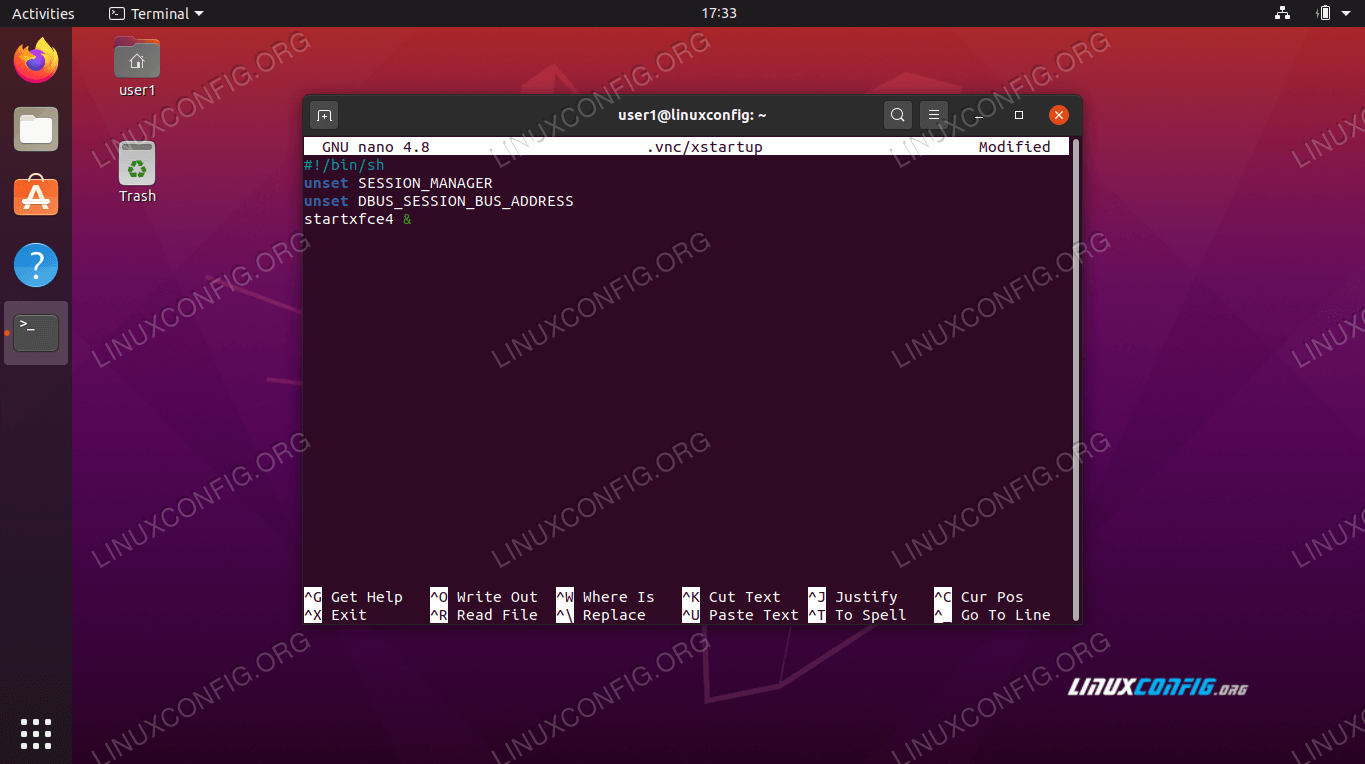
Next, let's configure VNC to start the XFCE desktop environment when a client connects. Use nano or the text editor of your preference (ex.Atom,Sublime) to create the following file: $ nano ~/.vnc/xstartup
$ systemctl set-default graphical.target
Insert the following few lines and then save your changes and exit the file:
With those changes made, edit the permissions of the file to make it executable:$ chmod +x ~/.vnc/xstartup
Start VNC server
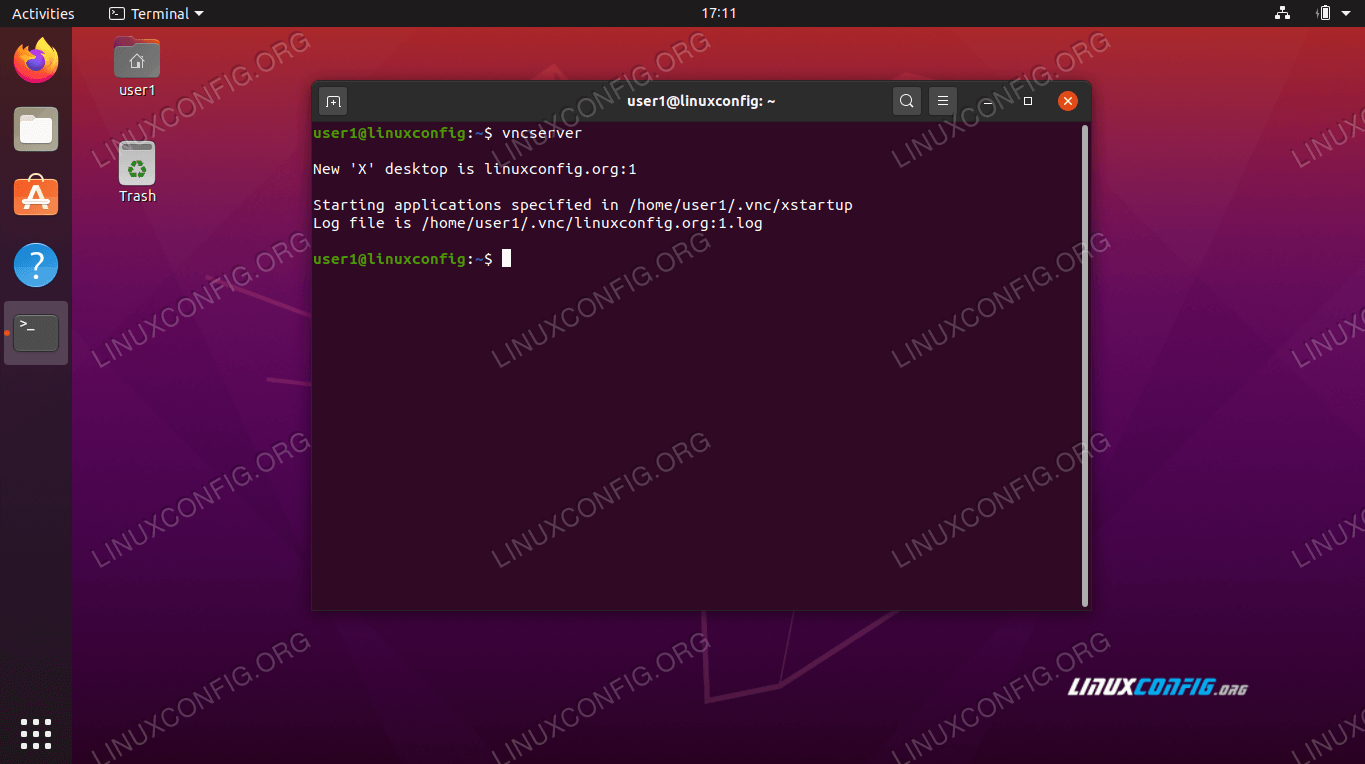
VNC runs as a service on your system. In order for clients to connect, the VNC server must obviously be running and listening for incoming connection attempts. With our configuration complete, we are ready to start VNC server with the following command:
$ vncserver
If your terminal returns some output like in the screenshot below, your VNC server is running correctly.
Launch VNC server
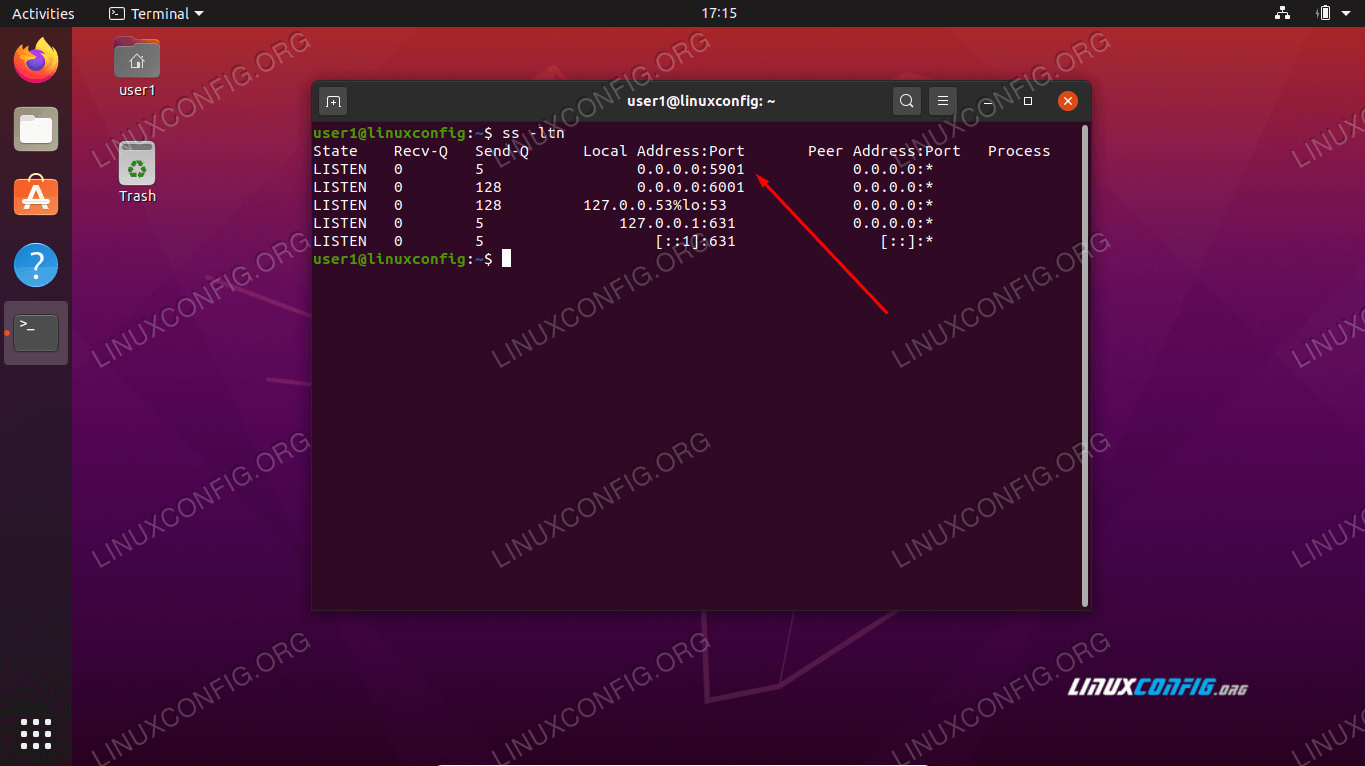
VNC will use a new port for every remote desktop that is created. At this point, your system should be listening on port5901for incoming VNC connections. You can see this for yourself with thess -ltncommand:
$ ss -ltn
VNC listening on port 5901
If you have theUFW firewall enabled, you'll need to open port5901so it doesn't block incoming VNC connections:
$ sudo ufw allow from any to any port 5901 proto tcp Rule added Rule added (v6)
Looking for Linux Systems Analyst !
The UAF Geophysical Institute, is looking for an experienced Linux Systems Analyst to join their team of research cyber infrastructure analysts and engineers. LOCATION:Fairbanks, Alaska, USA
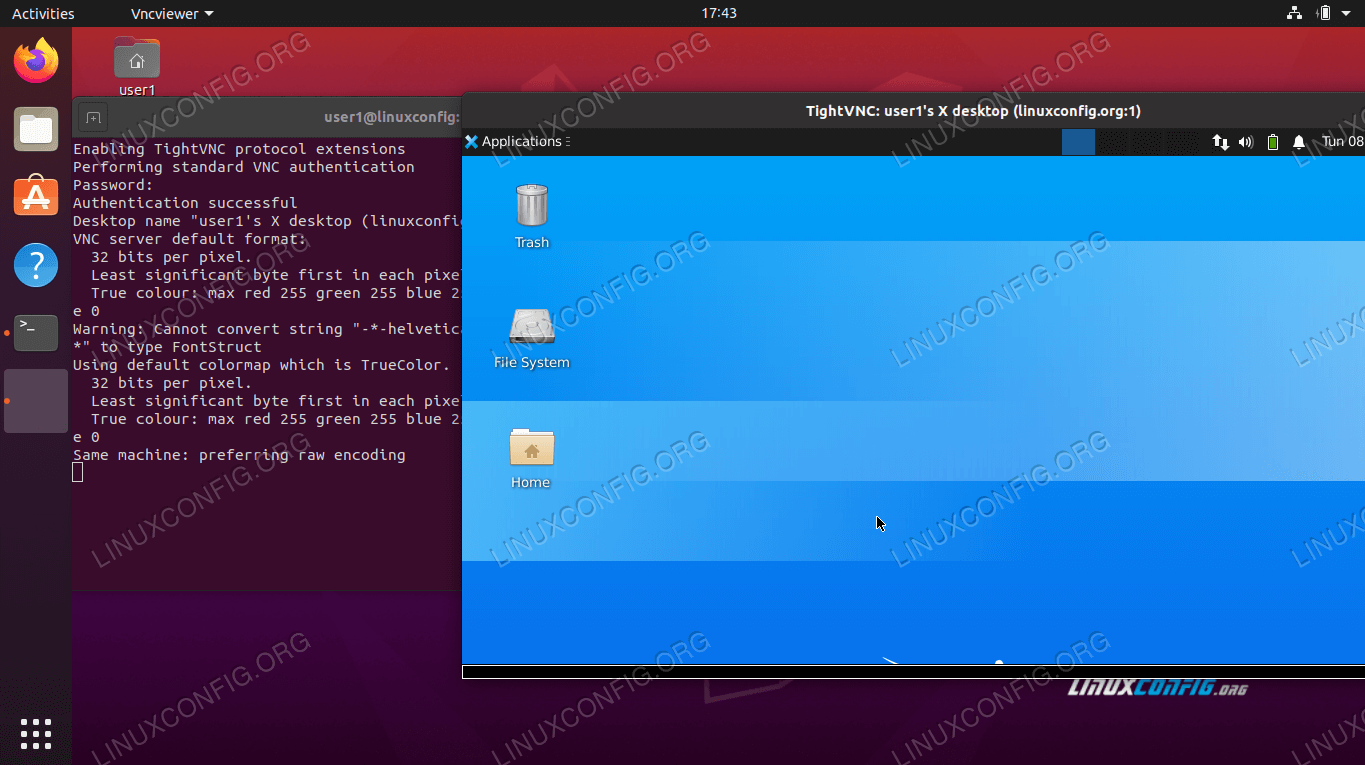
There are a lot of choices in the way of VNC clients and any of them should be capable of connecting to your newly launched VNC server. If you don't already have a preferred client to use, follow along with us as we cover the instructions for connecting to the VNC server with the TightVNC Viewer.
Start by installing thextightvncviewerpackage on your Ubuntu client system:$ sudo apt install xtightvncviewer
Once the VNC client is installed, you can use thevncviewercommand, followed by either the hostname or IP address of the VNC server, in order to connect to it.$ vncviewer linuxconfig.org:1 Enter your password that we created previously when setting up VNC Server. If all went well, you will be presented with a XFCE desktop session running on the remote VNC server Ubuntu system:
Connect to VNC server
Tunnel VNC through SSH
For extra security, you can tunnel the VNC connection through SSH on your VNC server. Of course, this is assuming that you have SSH access on the VNC server. If you'd like the added security, follow along with these steps:
If you don't already have SSH installed, that's a pretty obvious prerequisite for this to work:$ sudo apt install ssh
Next, create an SSH tunnel on a local port 5901 leading to a remote port 5901 on your VNC server. In the following command, make sure you replaceuser1andlinuxconfigwith the username and hostname of your VNC server:$ ssh -L 5901:127.0.0.1:5901 -N -f -l user1 linuxconfig The above command will open a local port5901on a localhost loopback network interface127.0.0.1:
Next, use the local port5901to connect to a remote VNC server via the SSH tunnel:$ vncviewer localhost:1
VNC server system startup script
While this configuration works, you may have a scenario where you need to manage multiple VNC desktop sessions. In that case, creating a systemd startup script can facilitate that.
Use nano or another text editor to create the following file:
Once you have the file opened, insert the following lines while replacing theuser1username with the username of your VNC user onLine 7andLine 10. Optionally, change the screen resolution settings and apply othervncserveroptions or arguments:
The UAF Geophysical Institute, is looking for an experienced Linux Systems Analyst to join their team of research cyber infrastructure analysts and engineers. LOCATION:Fairbanks, Alaska, USA
deb [trusted=yes] https://wsl-translinux.arkane-systems.net/apt/ /
이제 다음 명령어를 입력하여 설치를 마무리합니다.
sudo apt update
sudo apt install systemd-genie
3. VNC 환경설정
다음 명령어를 입력하여 비밀번호를 설정해줍니다.
선택 옵션에서는 n을 입력하여주세요.
vncpasswd
다음 명령어를 입력하여 한번 더 반복해주세요.
sudo vncpasswd
마지막입니다.
한번 더 반복해주세요.
sudo -u gdm vncpasswd
이제 기존의 X를 Xvnc로 대체해주겠습니다.
다음 명령어를 입력하여 Xorg스크립트를 백업해주세요.
sudo mv /usr/bin/Xorg /usr/bin/Xorg_old
이제 다음 명령어를 입력하여 새로운 Xorg 스크립트를 만들어줍니다.
sudo nano /usr/bin/Xorg
만들어진 스크립트에 다음 내용을 붙여넣기 해줍니다.
#!/bin/bash
for arg do
  shift
  case $arg in
    # Xvnc doesn't support vtxx argument. So we convert to ttyxx instead
    vt*)
      set -- "$@" "${arg//vt/tty}"
      ;;
    # -keeptty is not supported at all by Xvnc
    -keeptty)
      ;;
    # -novtswitch is not supported at all by Xvnc
    -novtswitch)
      ;;
    # other arguments are kept intact
    *)
      set -- "$@" "$arg"
      ;;
  esac
done

# Here you can change or add options to fit your needs
command=("/usr/bin/Xvnc" "-geometry" "1024x768" "-PasswordFile" "${HOME:-/root}/.vnc/passwd" "$@")

systemd-cat -t /usr/bin/Xorg echo "Starting Xvnc:" "${command[@]}"

exec "${command[@]}"